Teardown of Ricoh Theta 360 Degree Spherical Panorama Camera
The first impression of the Ricoh Theta 360 Degree Spherical Panorama Camera is its odd appearance — to me it feels like a bar of chocolate wafer. The dual lens reminds me of the bubble eye goldfish. For some reason I was given this 1st generation Ricoh Theta camera for free, but broken. So why not taking a peak at its inside?
The camera was wrapped with aluminum straps by double-sided tapes to cover the screws. Removing the straps would expose the screws. And that would be the starting point for the teardown.
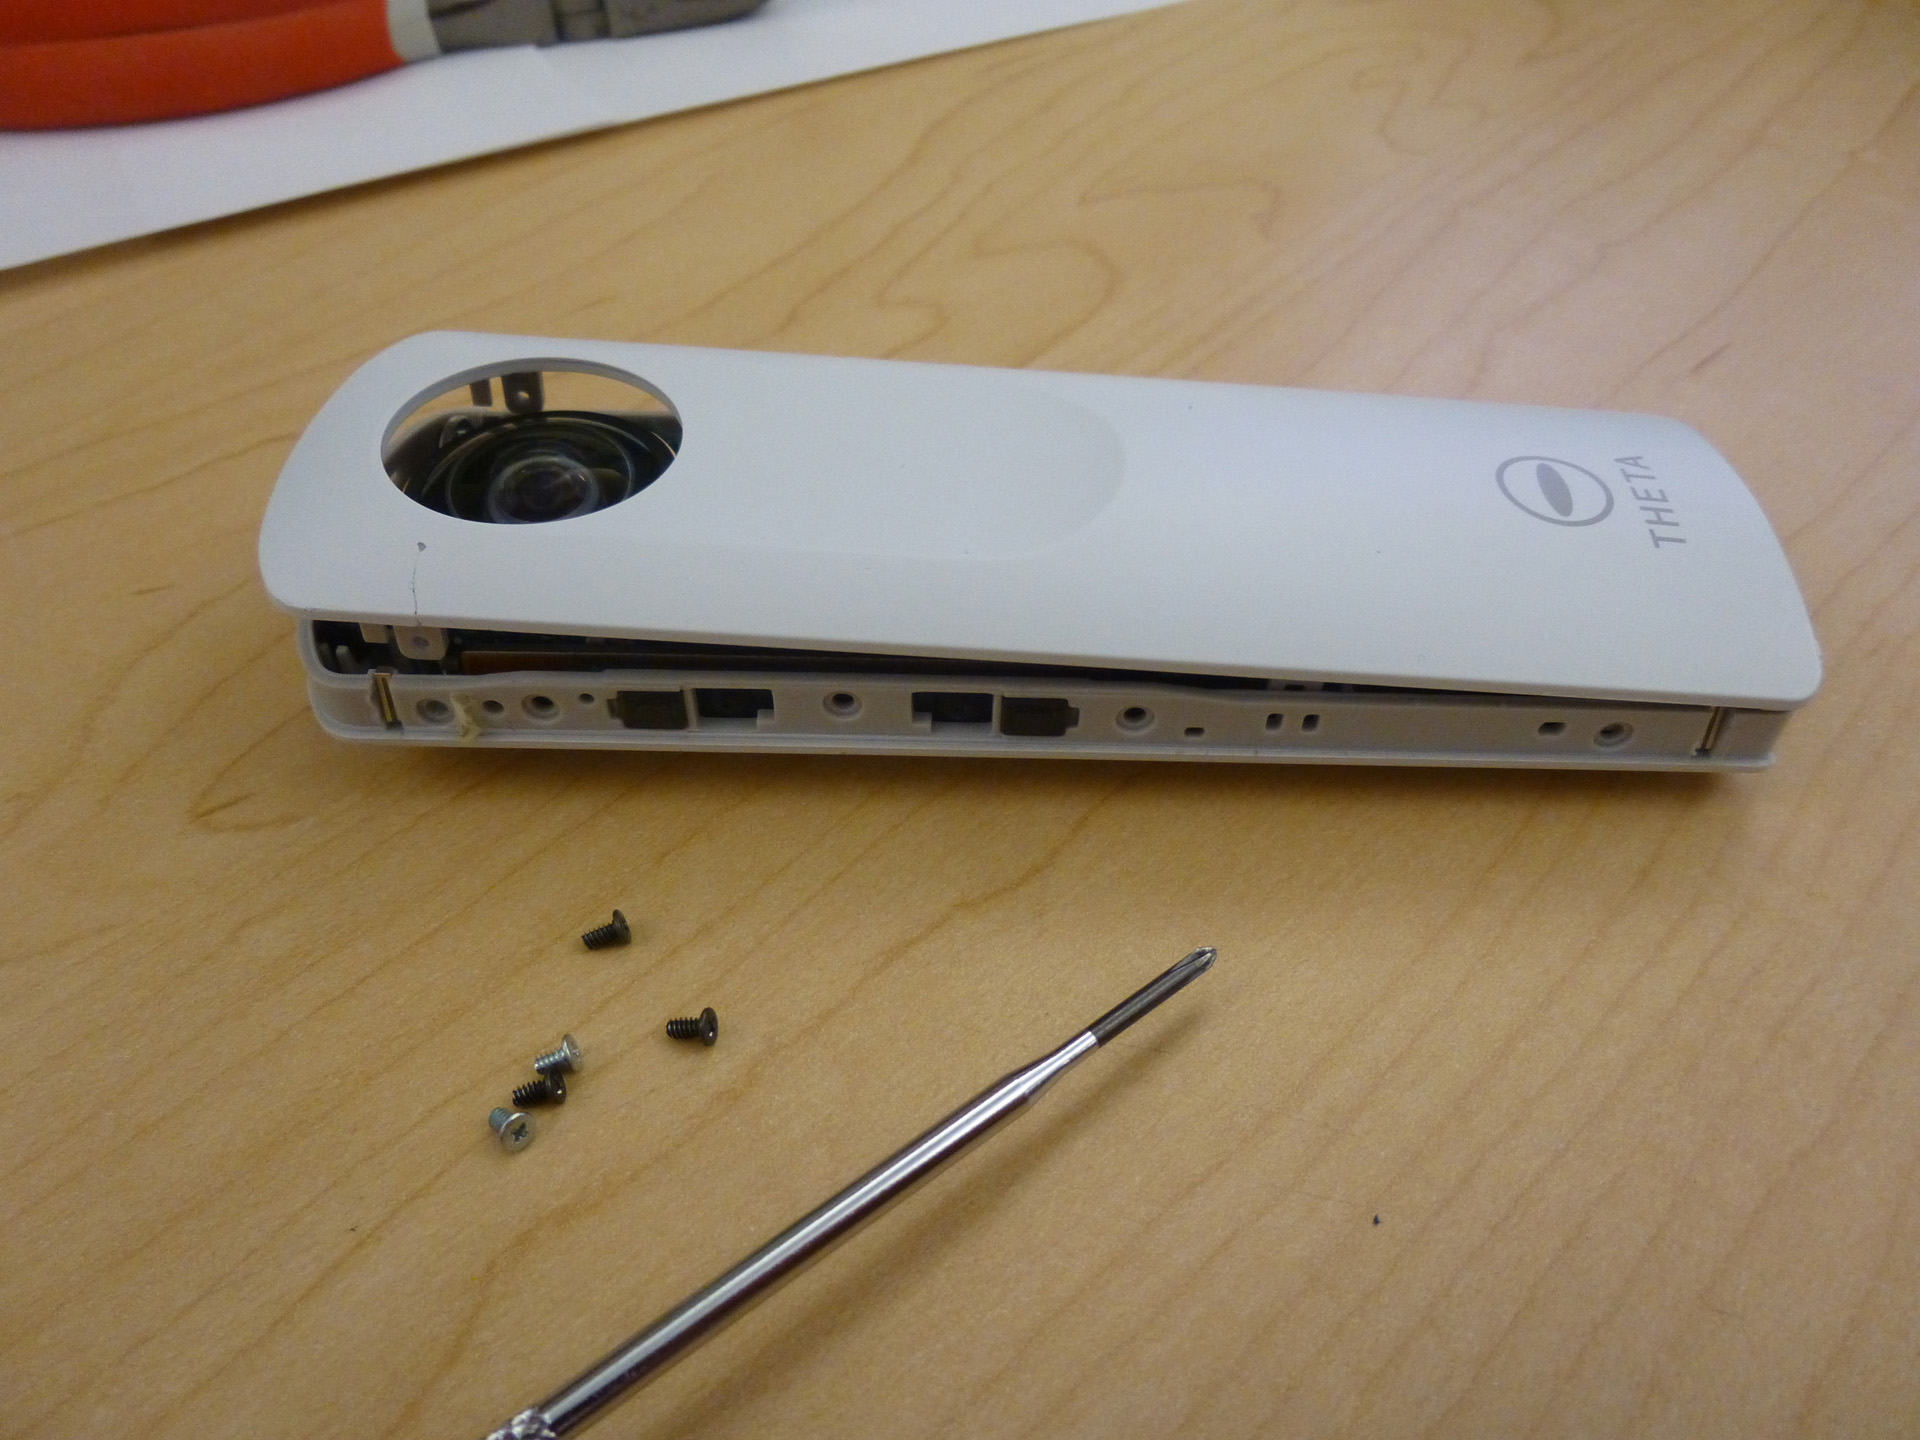
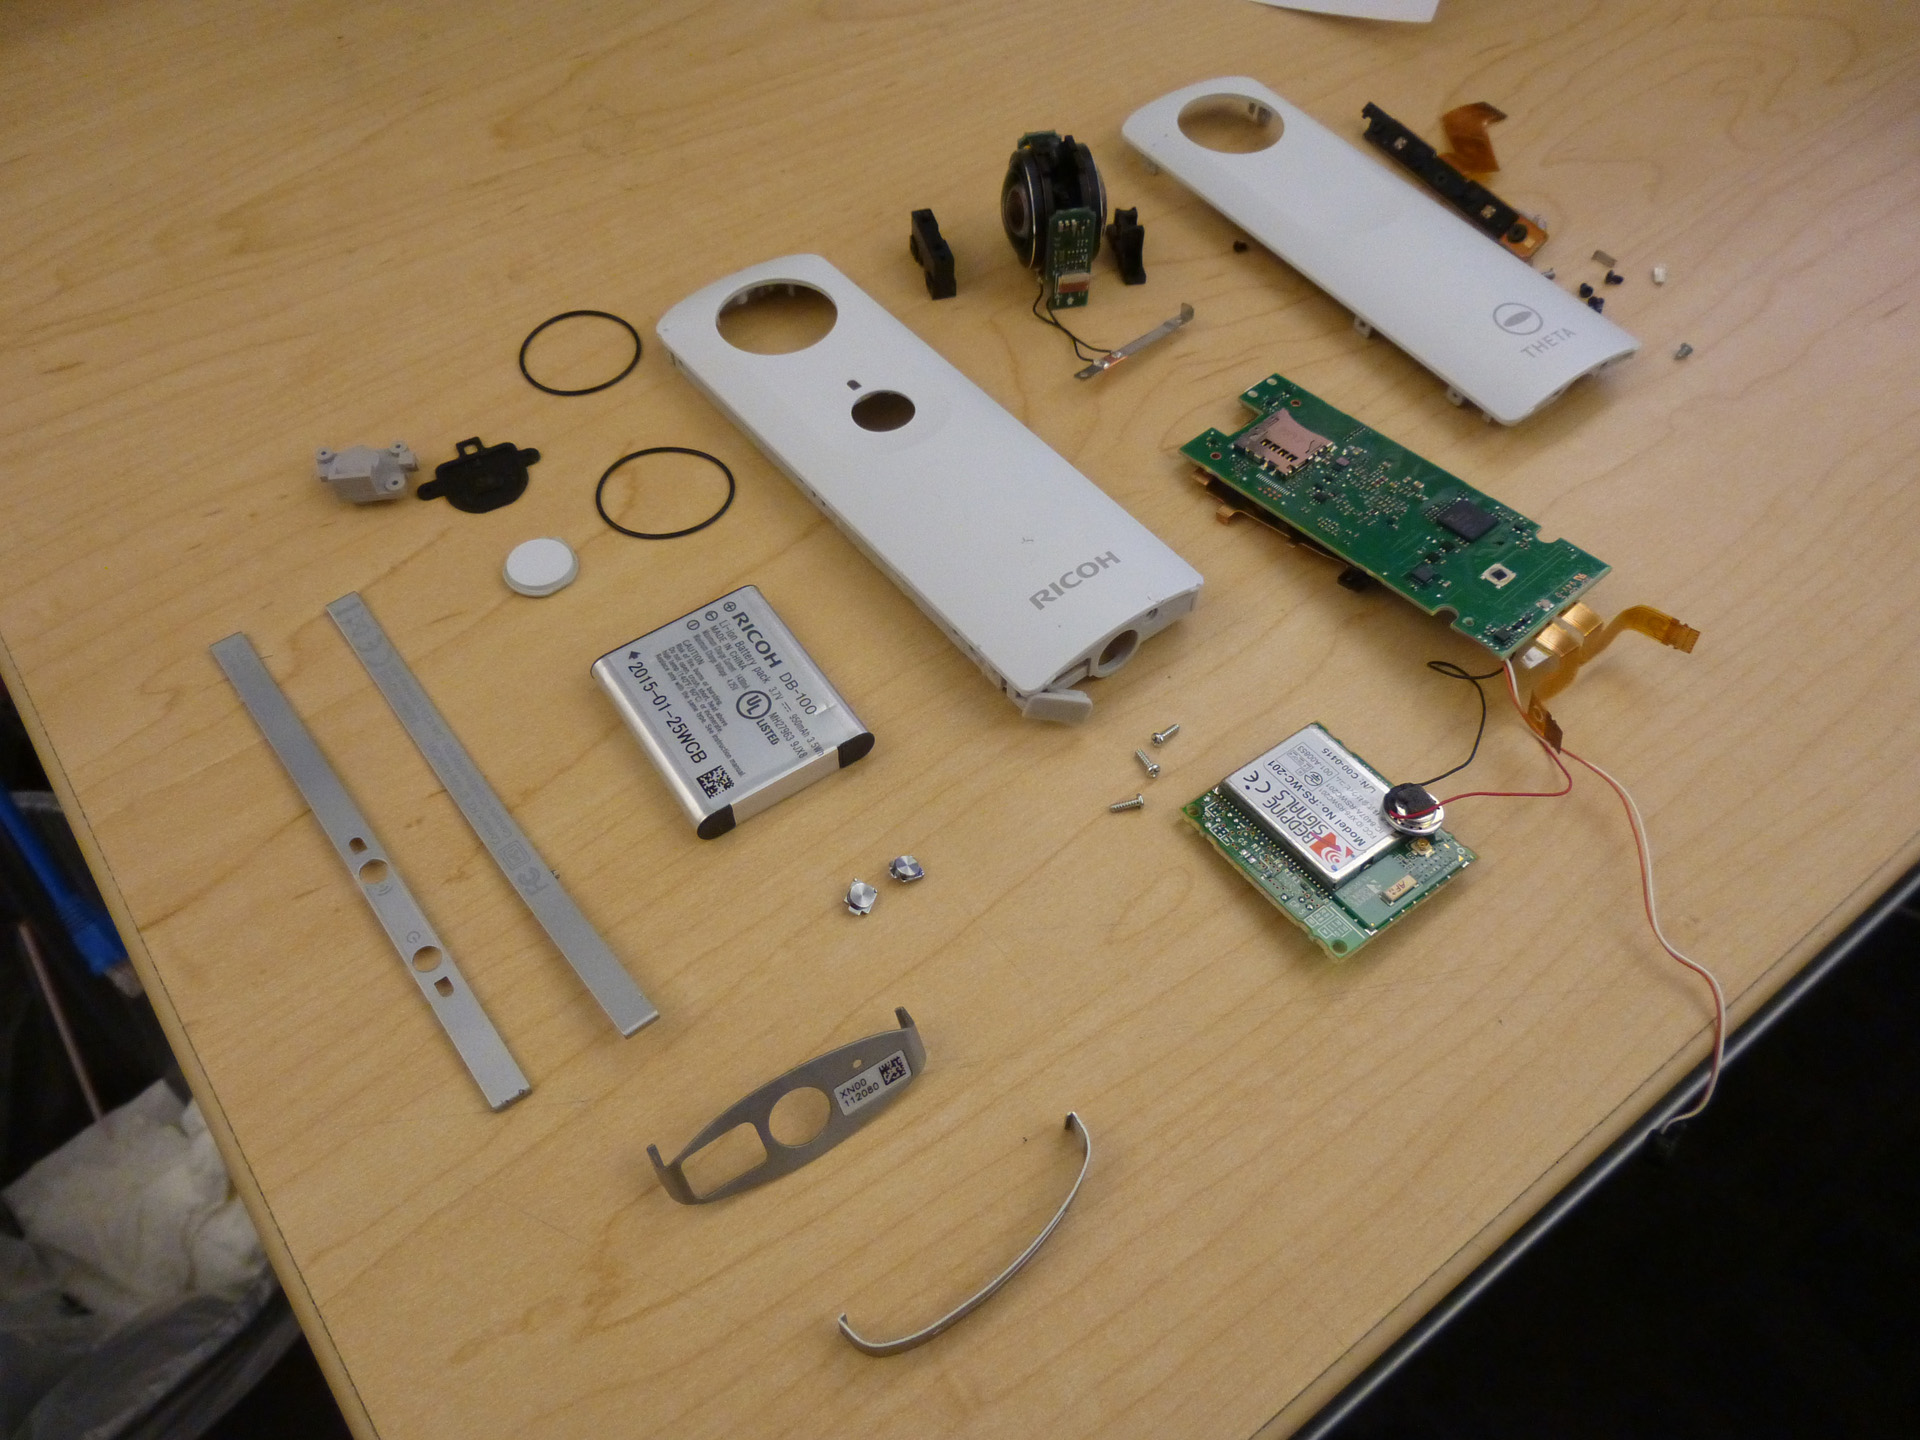
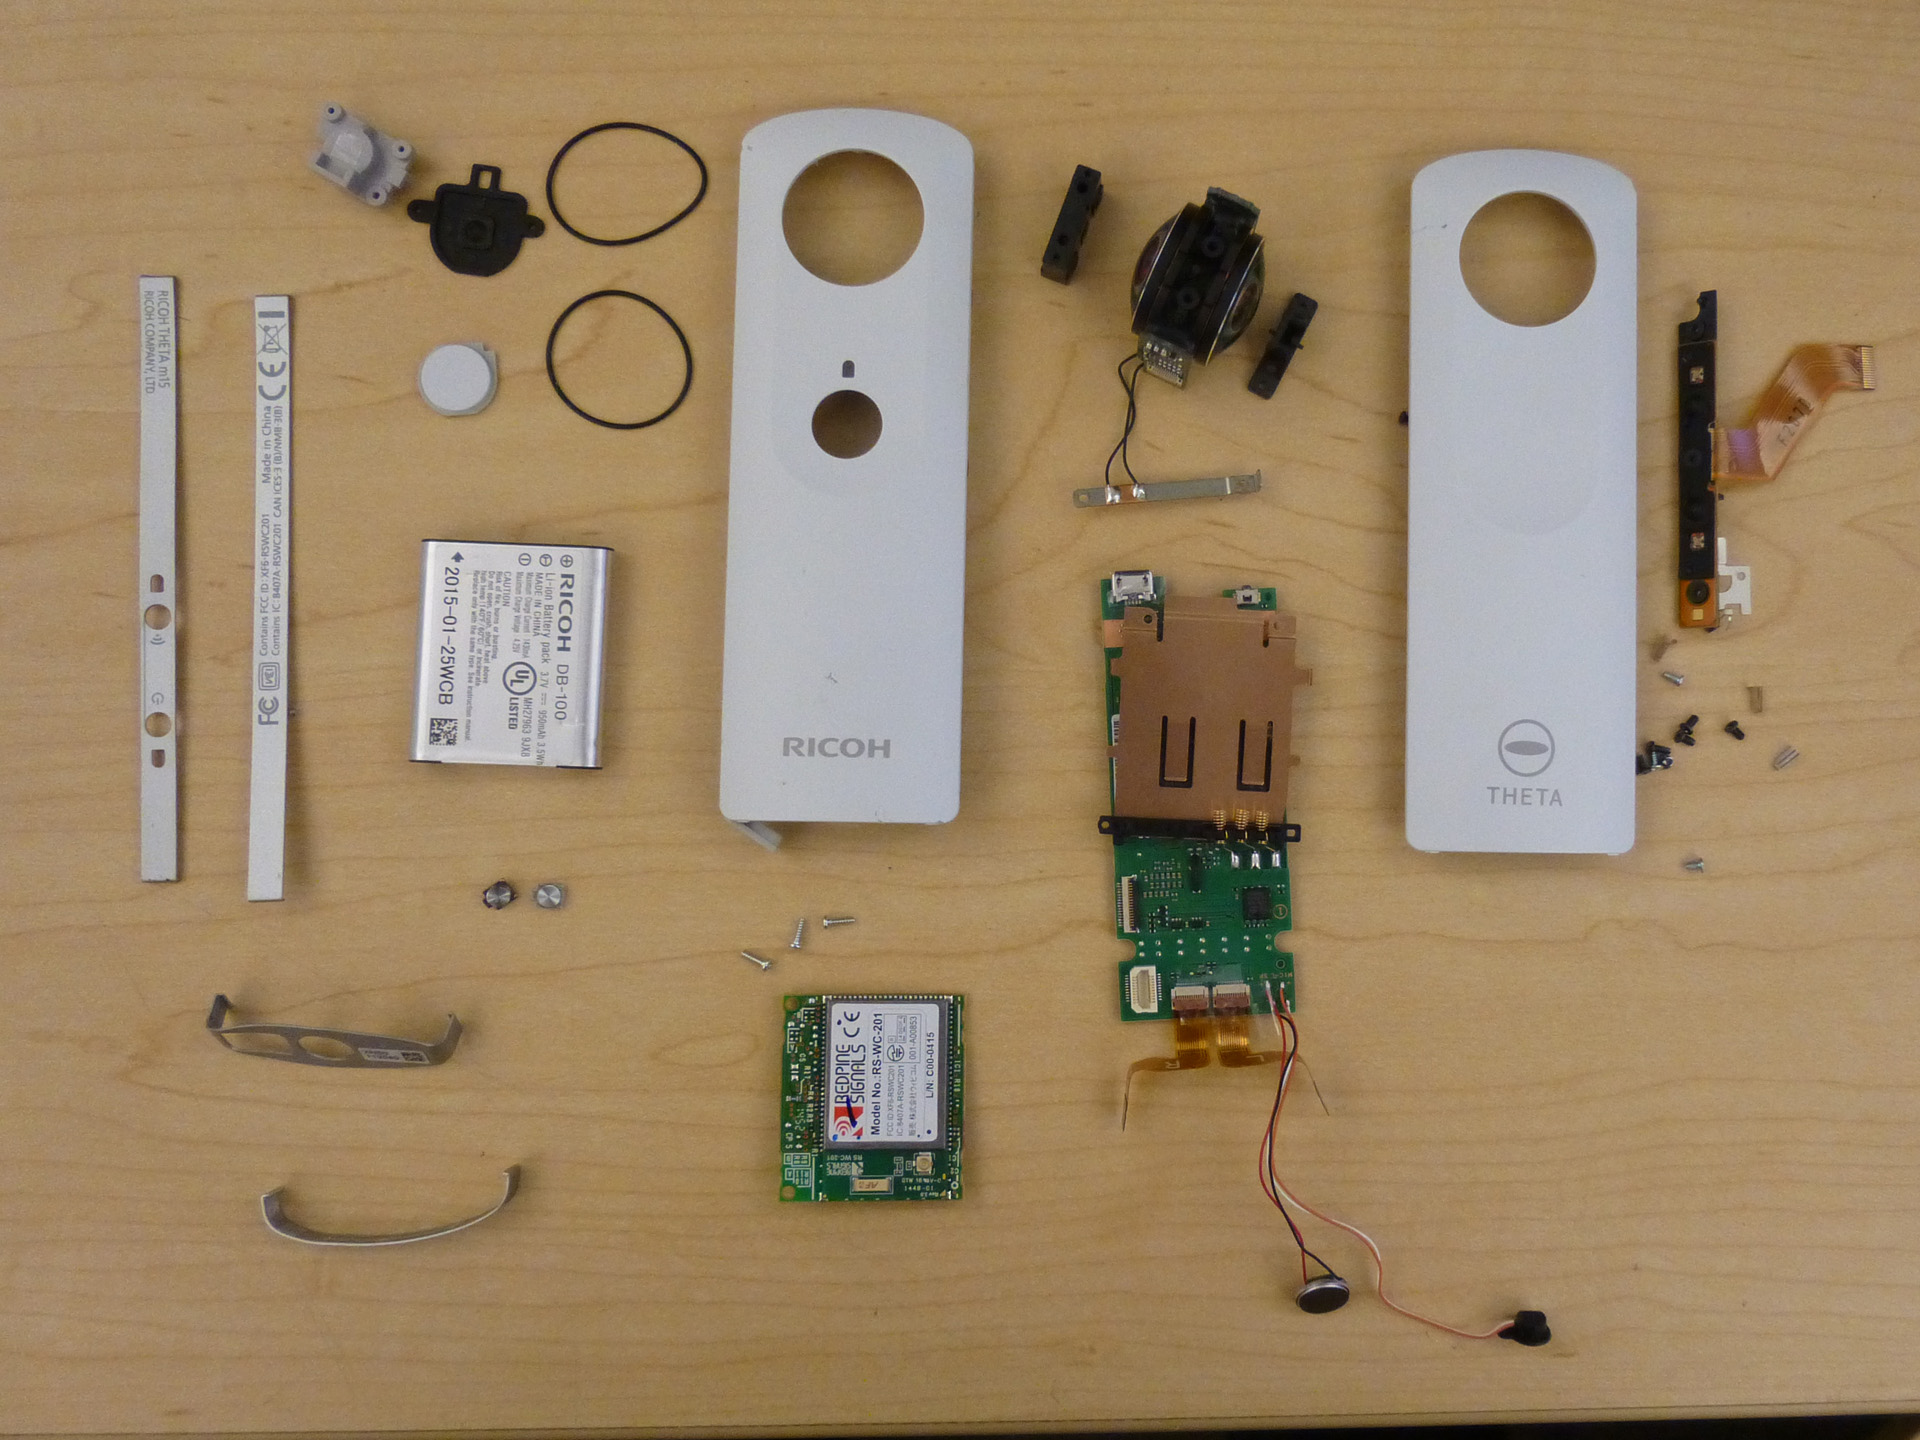
There were quite a few screws on the sides. Once they were all gone, the cover popped up easily. Now you can see what’s enclosed: battery; circuitry and optical module. Looks like each section takes equal amount of space inside the camera body.
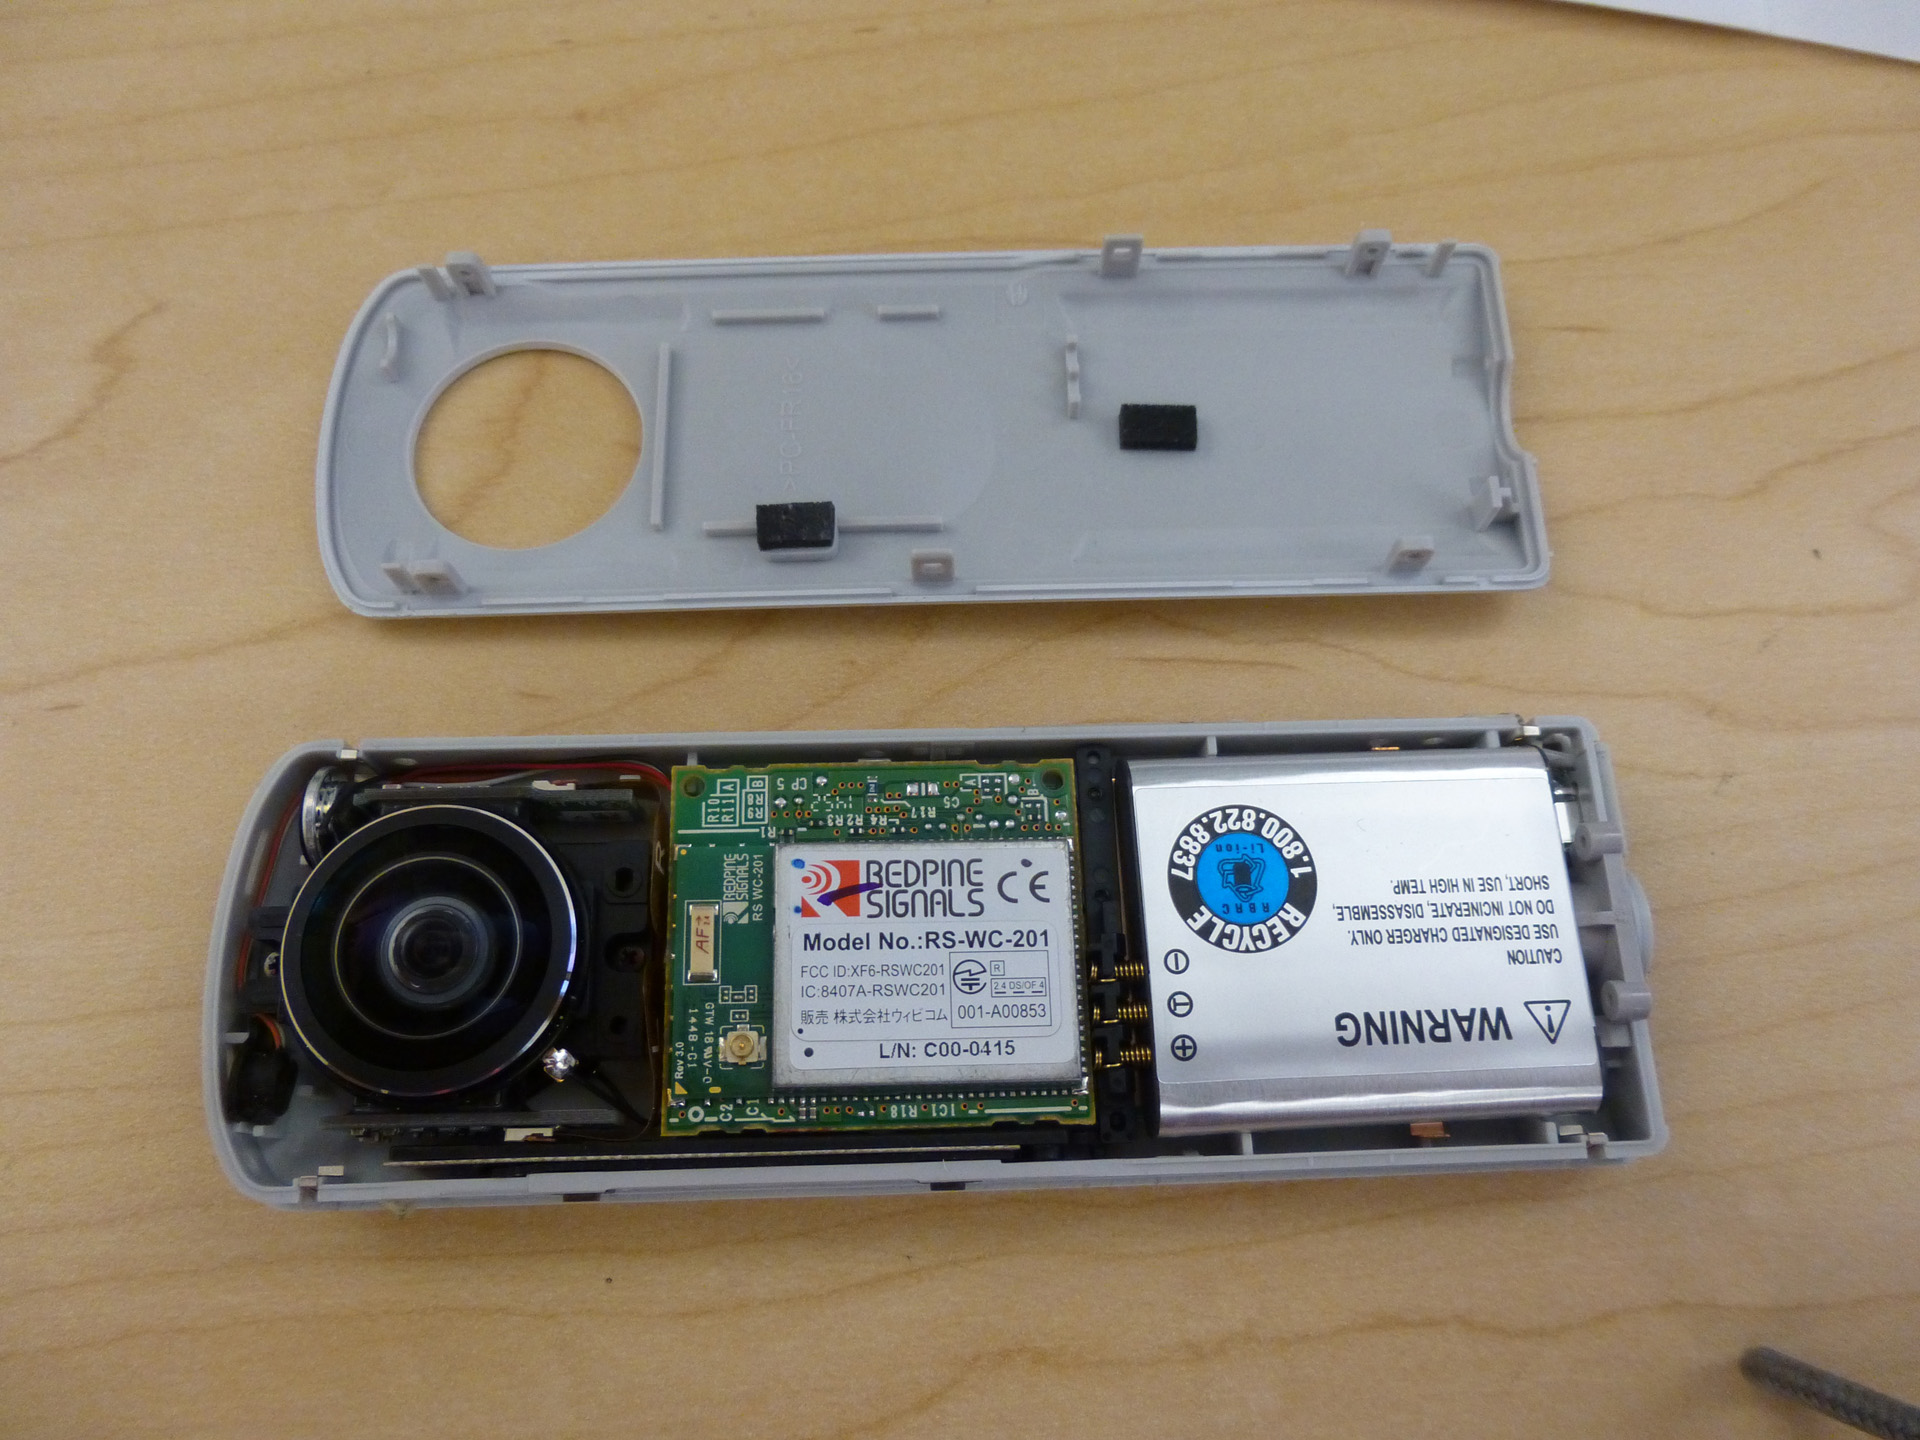
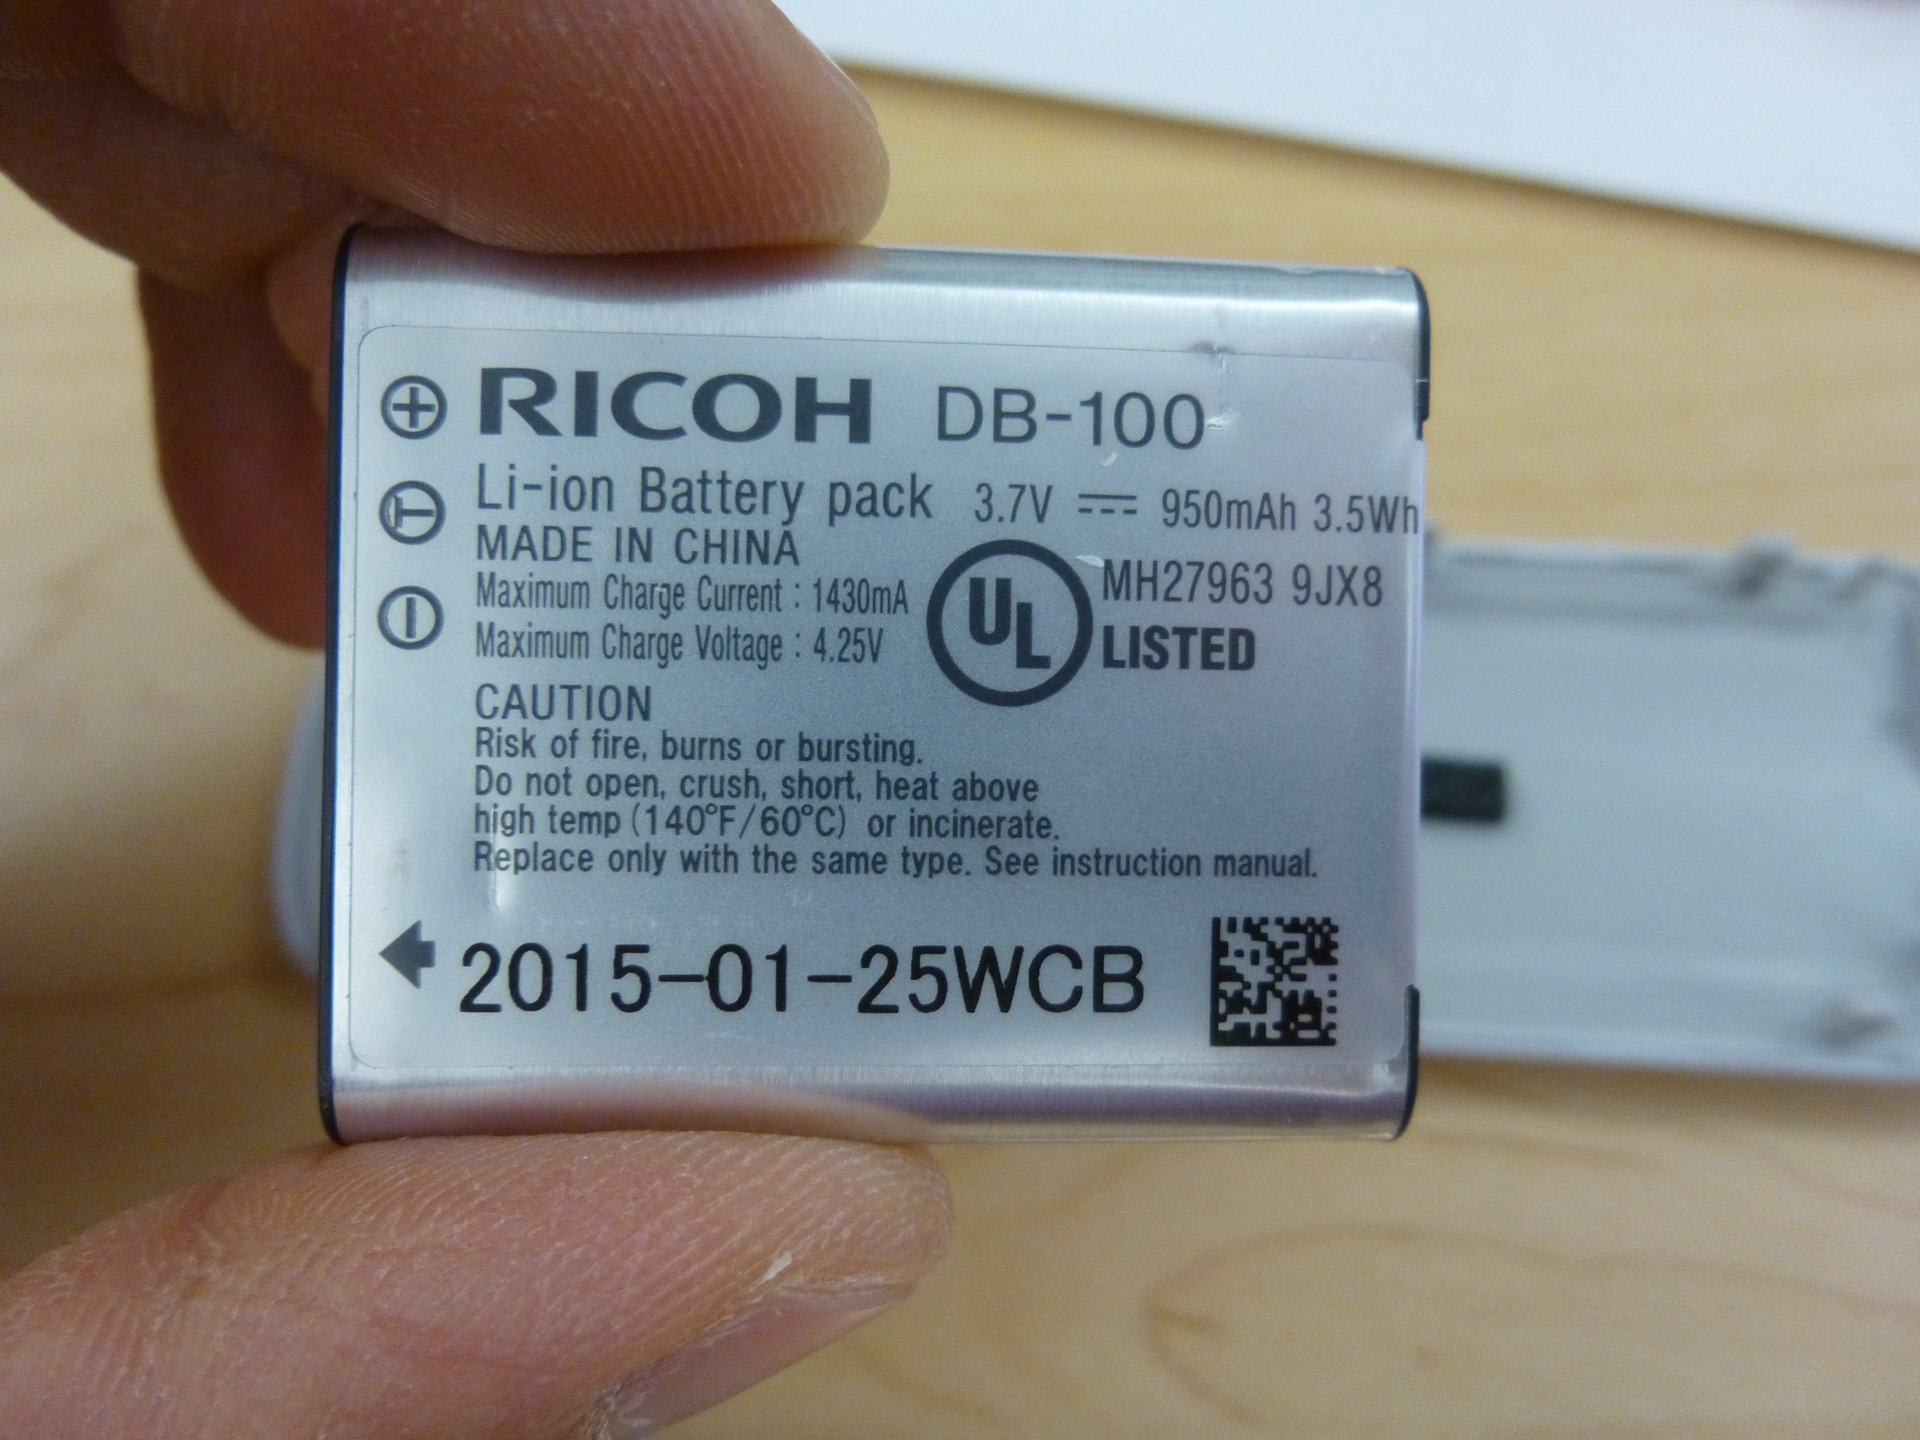
The Li-ion battery (model: DB-100) is quite beefy, to be honest. It is actually a Ricoh’s standard rechargeable battery product, which is also being used on CX5, CX4 and CX2 cameras. No wonder it looks a little over-sized for the slim panorama camera. I guess Ricoh could cut down the cost by doing so.
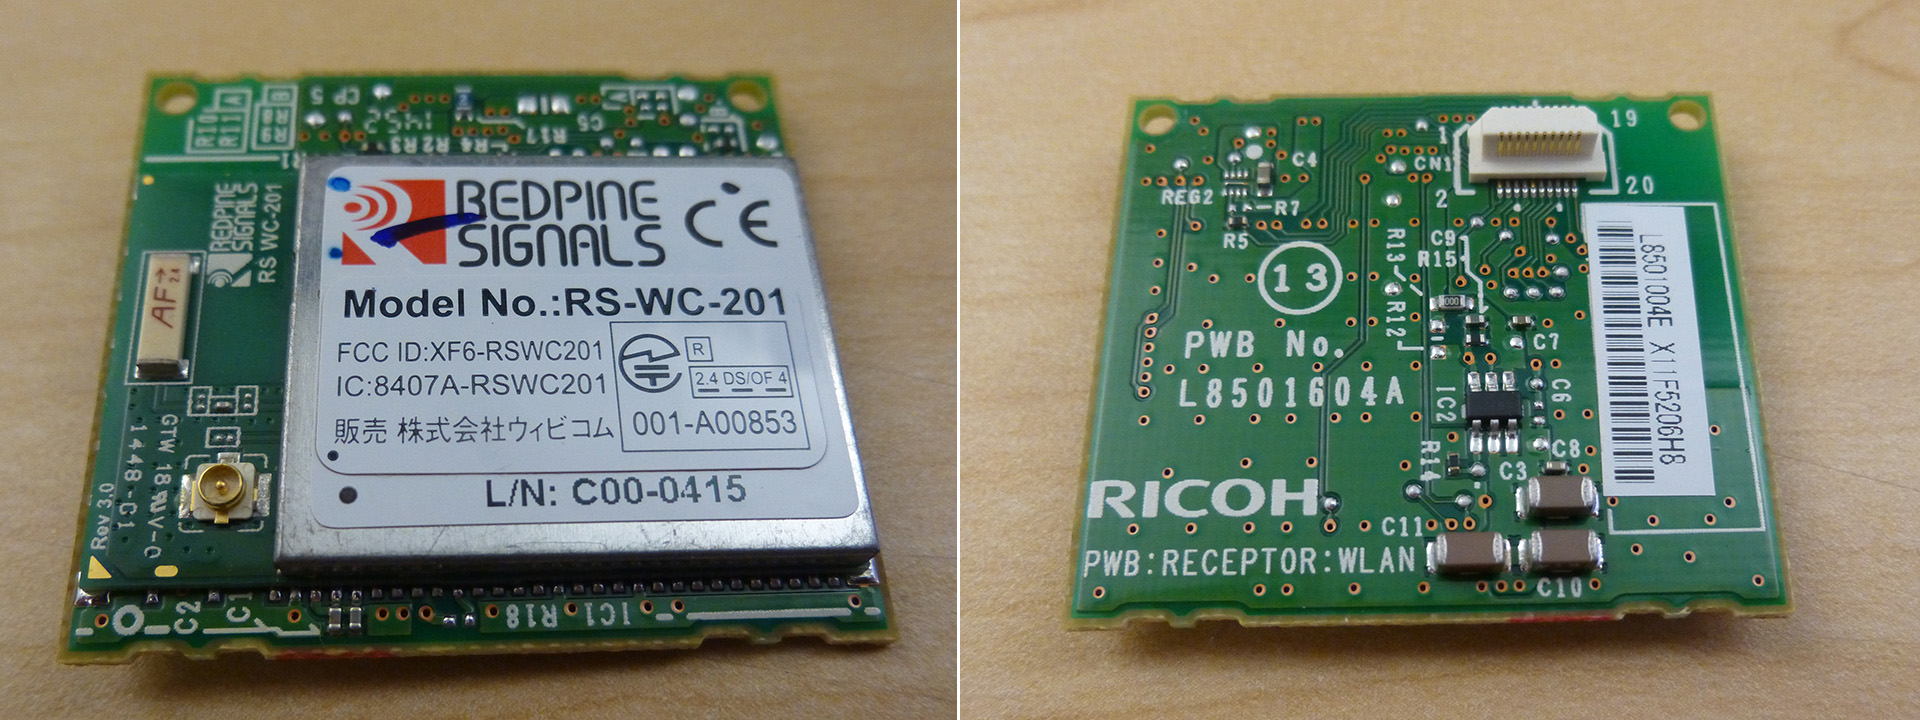
Panorama camera is equipped with a RS-WC-201 wireless module from Redpine Signals. This module supports 802.11b/g and single stream 802.11n, up to 65Mb/s. Retail priced at about $65.00USD from Mouser. Same feeling for the battery that it is also quite big….but off-the-shelf means lower cost, why not?
Unplugging the wireless module will expose the mother board and the optical assembly. The optical assembly, featuring two big fish-eye like lens in a back-to-back configuration, is well sealed and weighs a lot. A metal strap was wrapping around the lens, and was soldered on to the mother board through black jump wires. I guess that was some sort of anti-static protection since the camera design made it very likely for a user to touch the lens. Although the lens is a passive component, prone to electrical discharge, the enclosed image sensor (I will show you later) may get affected if the lens takes the charge.
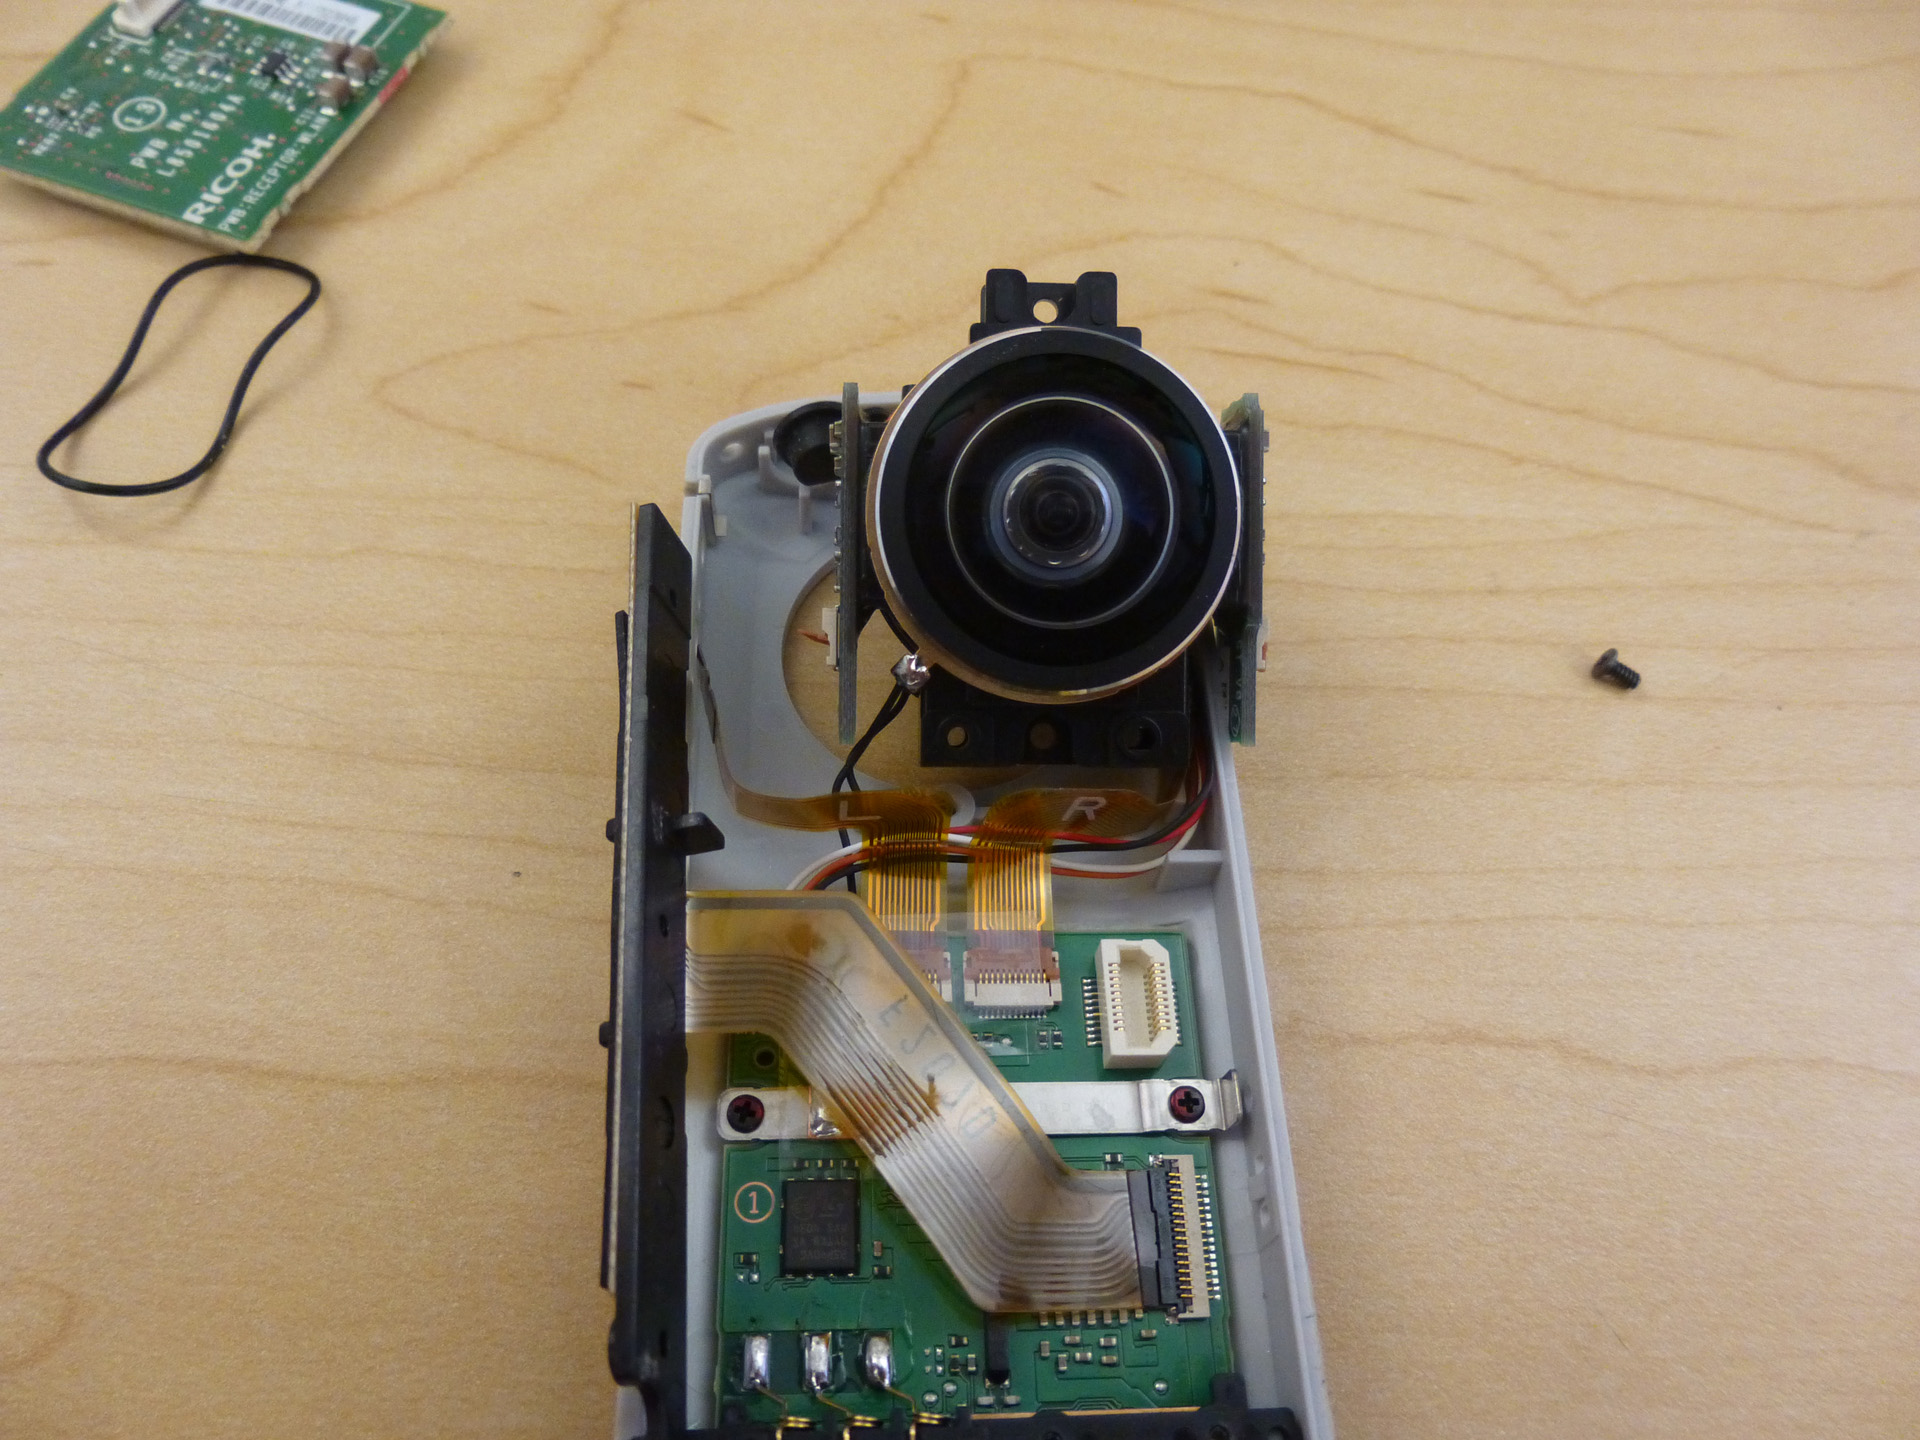
The mother board is actually bigger than my first glance. It goes under the battery, covering the whole body except for the lens area.
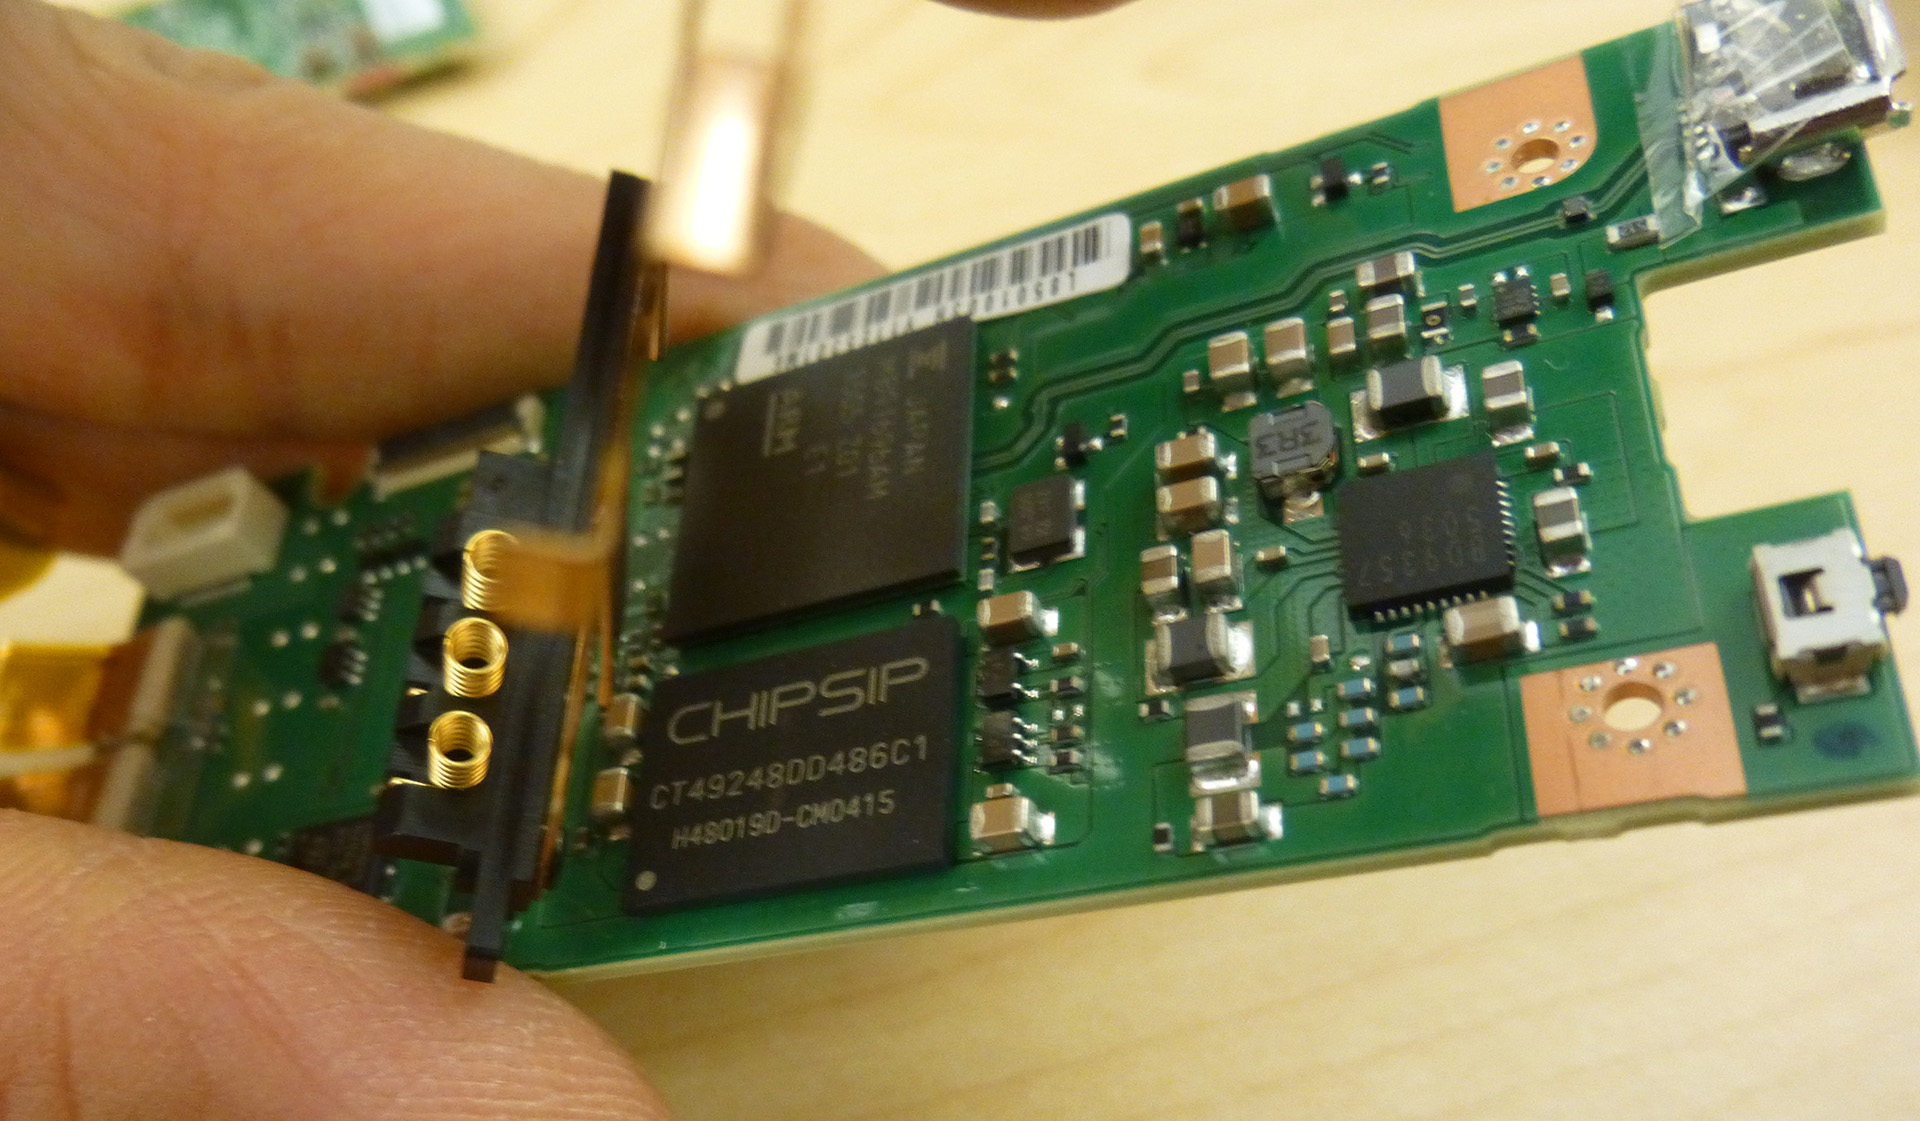
Another interesting discovery from the back of the mother board is that the Theta camera is utilizing a 4G micro SD card as extra storage.
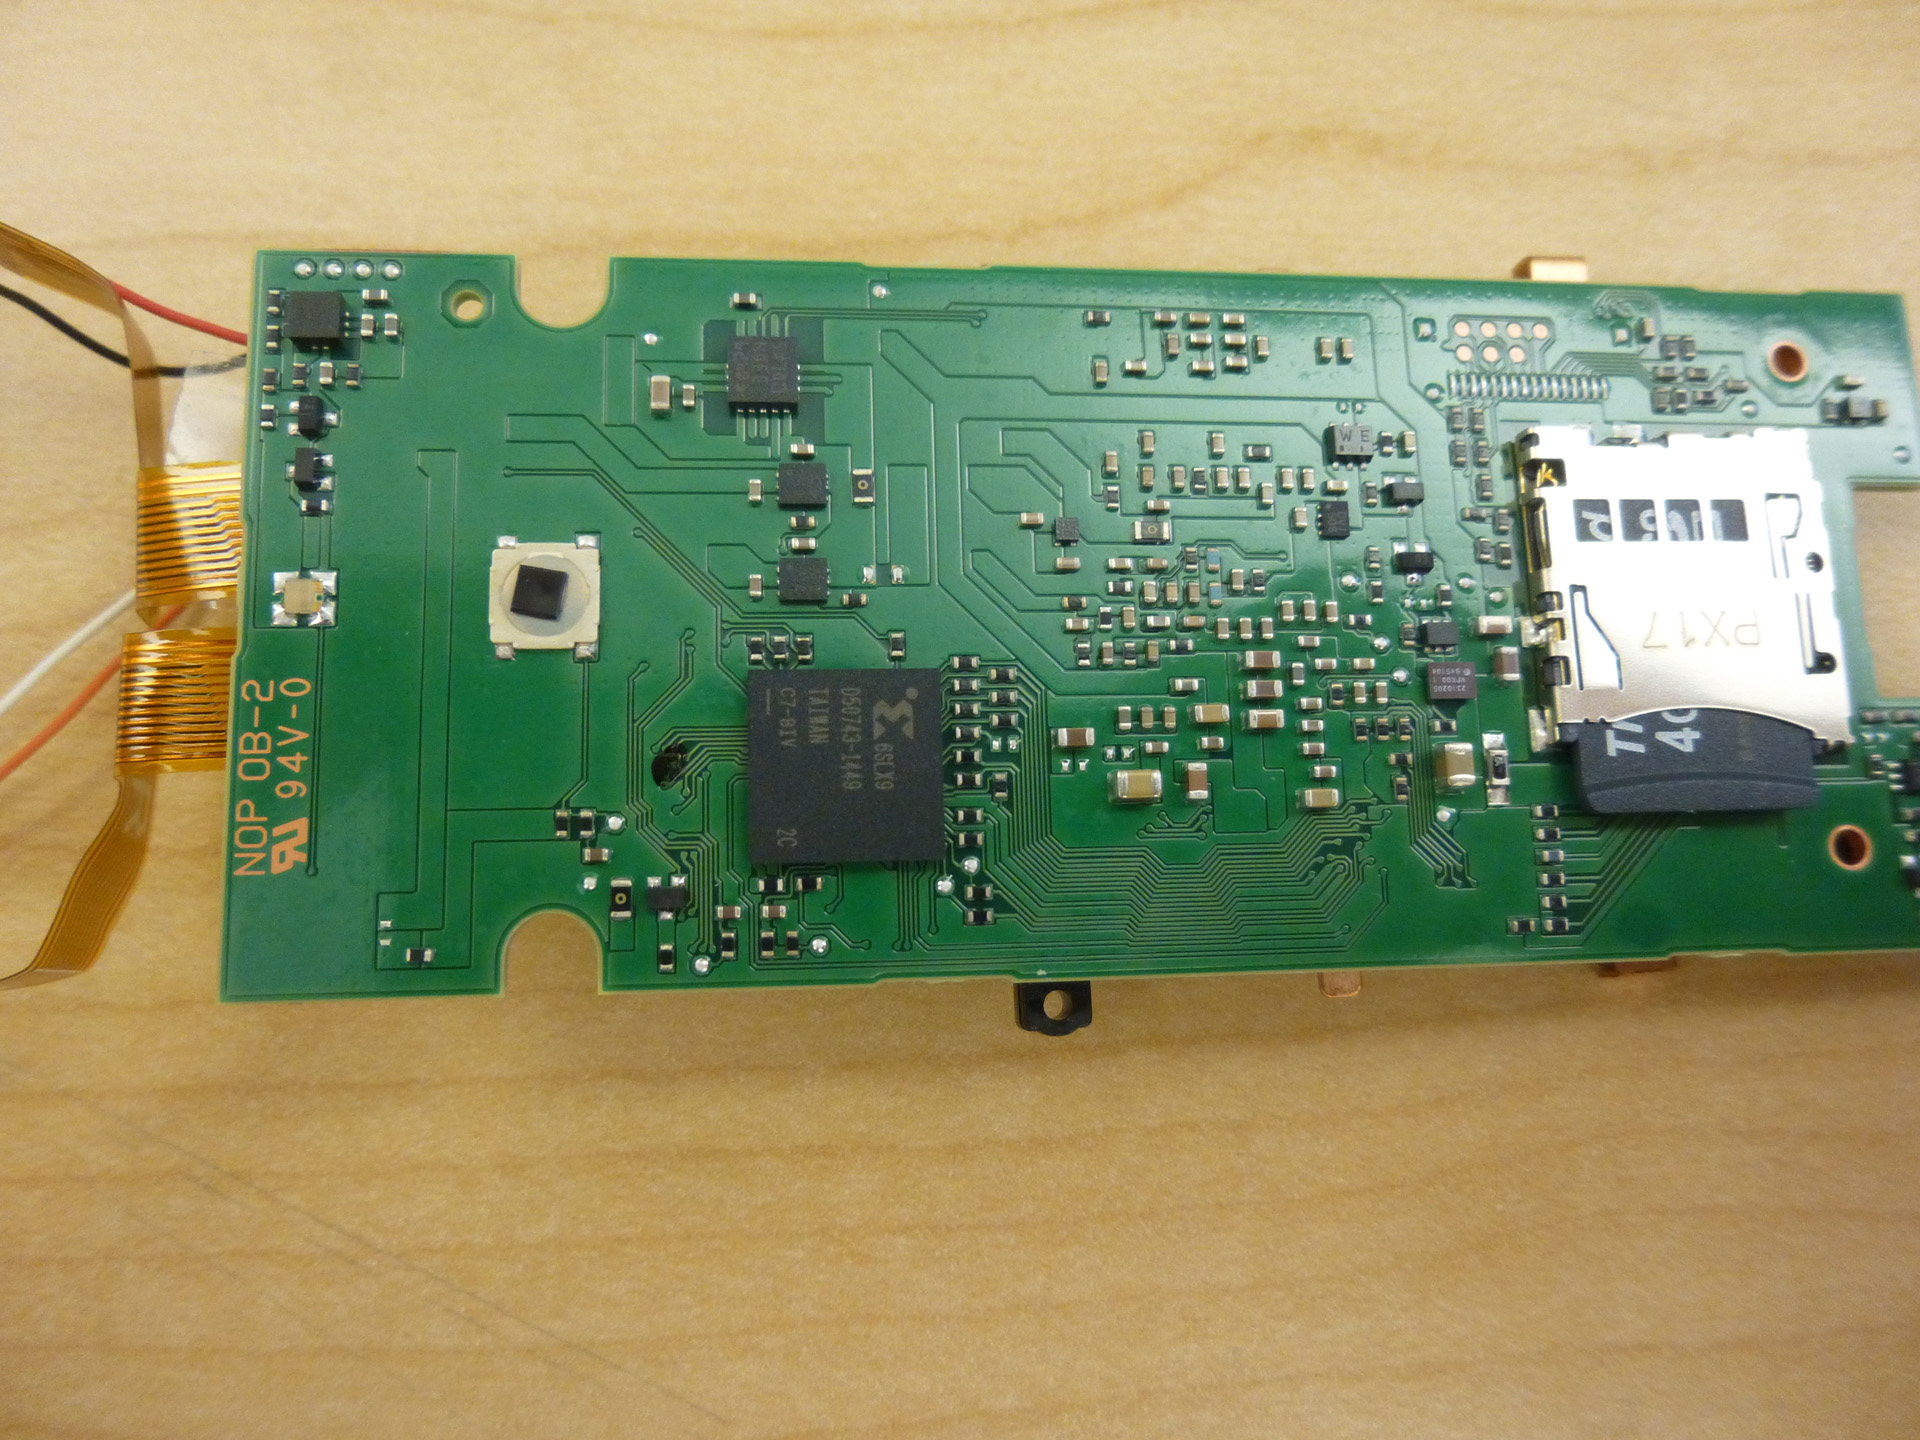
A piece of metal shield covers the ARM processor and the memory chip. The ARM processor is Fujitsu Milbeaut Image Processor MB91696AM, equipped with a dual-ARM core and built-in H.264 codec that supports Full HD video. This processor seems to be 4~5 years old already, its maximum of 5.5fps at 20MP doesn’t look too fancy on today’s market. That’s probably part of the reasons why Ricoh has released a new generation: Ricoh Theta S. The memory chip from CHIPSIP model CT49248DD486C1 is NAND(1Gb)+DDR3(2Gb). So my question is, if the storage size could be easily increased by using a bigger NAND chip, what is the necessity for an add-on micro SD card? Maybe it is easy to make models for different memory size?
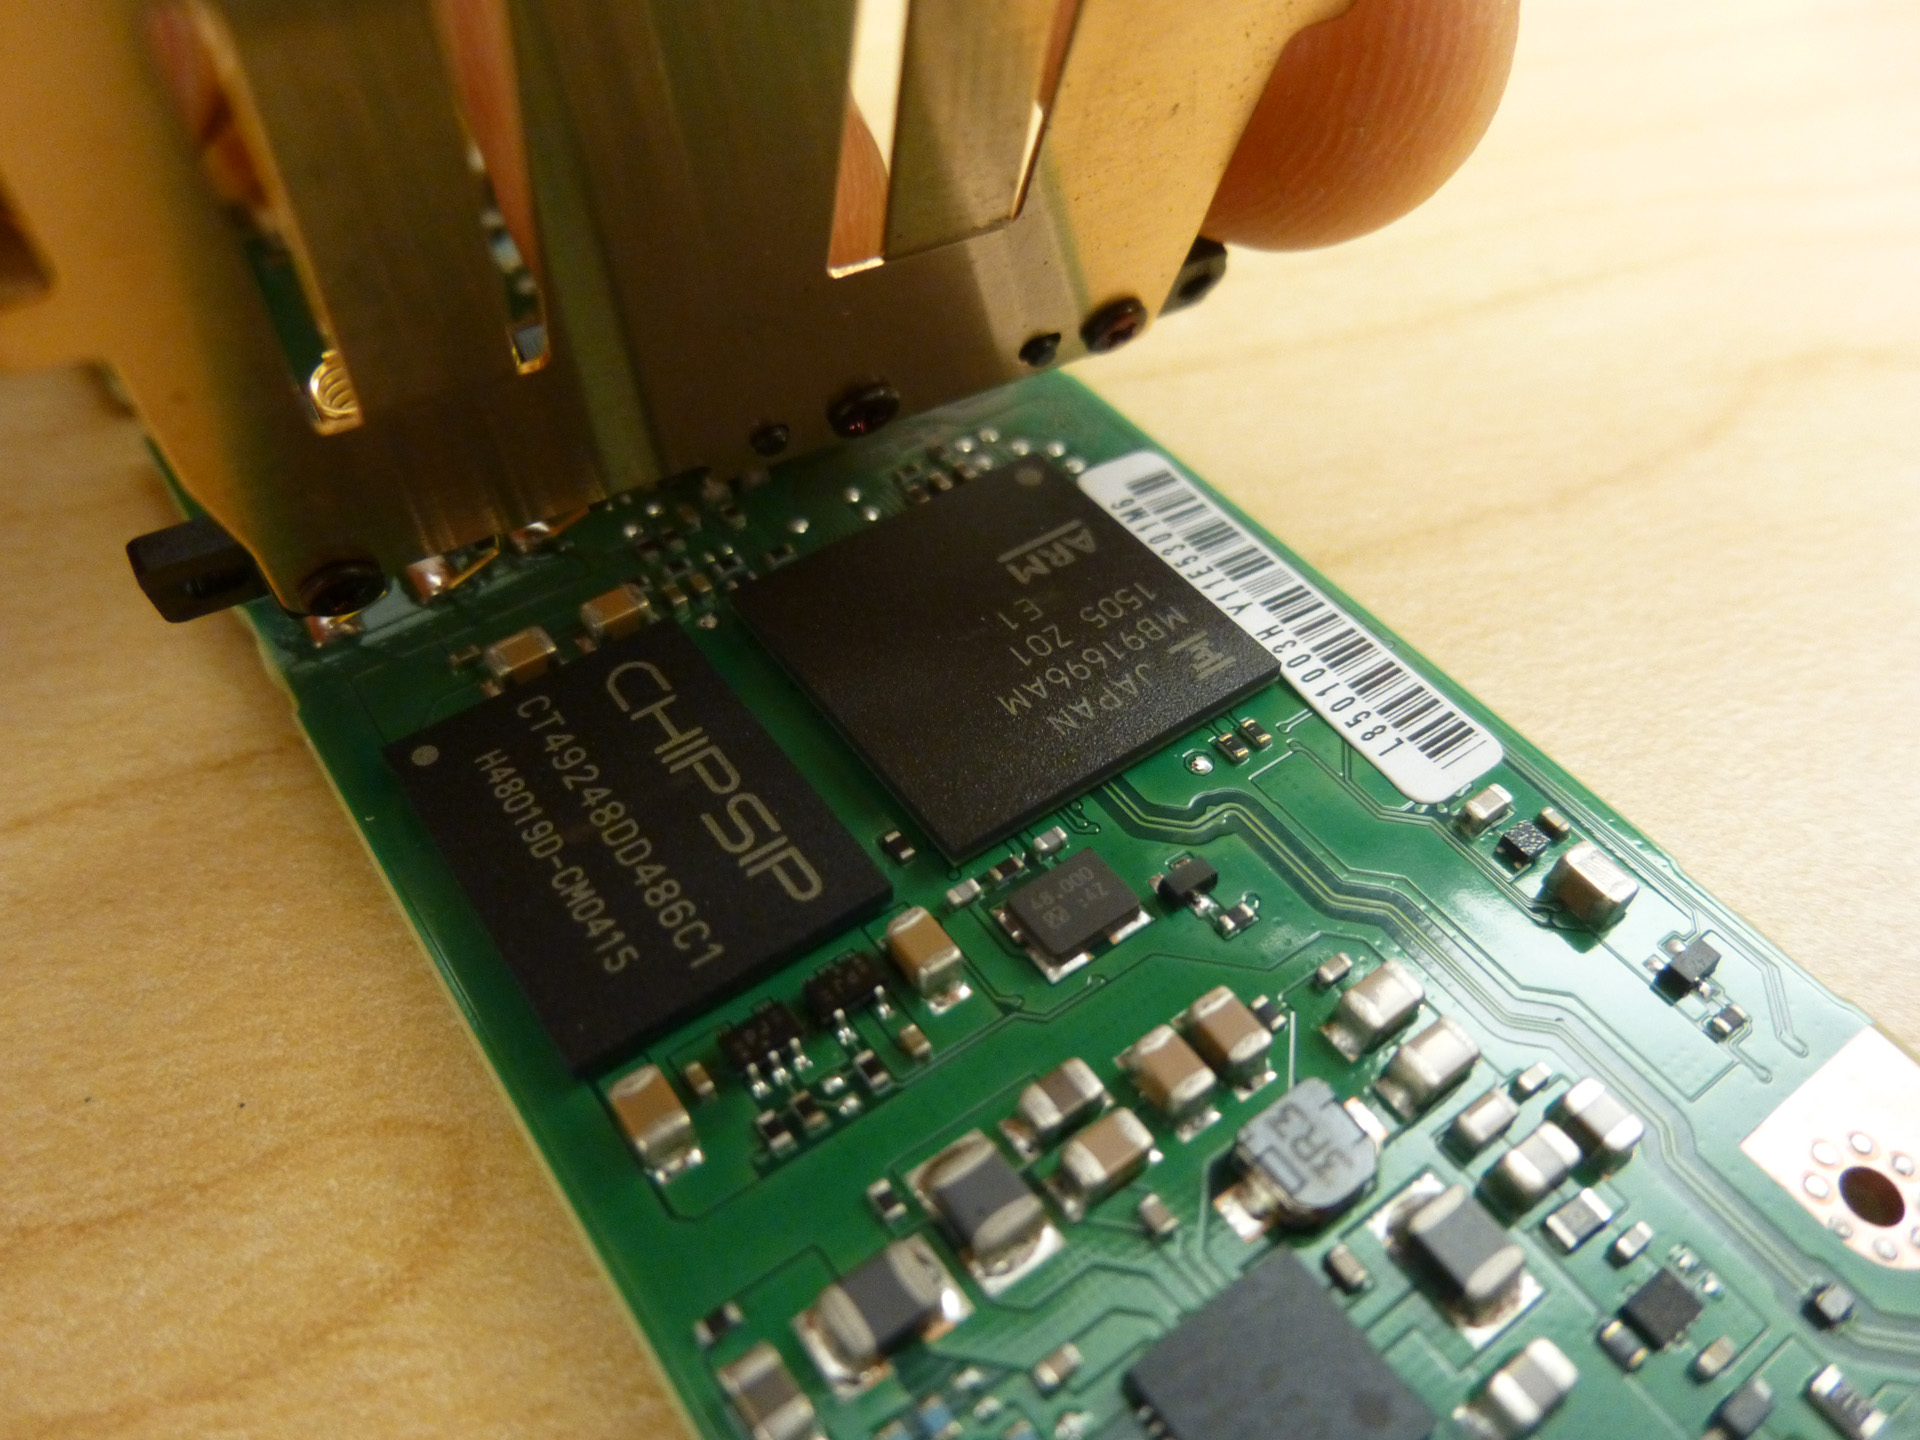
The Xilinx Spartan-6 FPGA, the dual-core ARM processor and the memory chipset make the image processing engine for the Ricoh Theta camera. What makes it different from all other cameras is the unique optical/image sensor assembly that is capable of capturing 360° panorama photo.
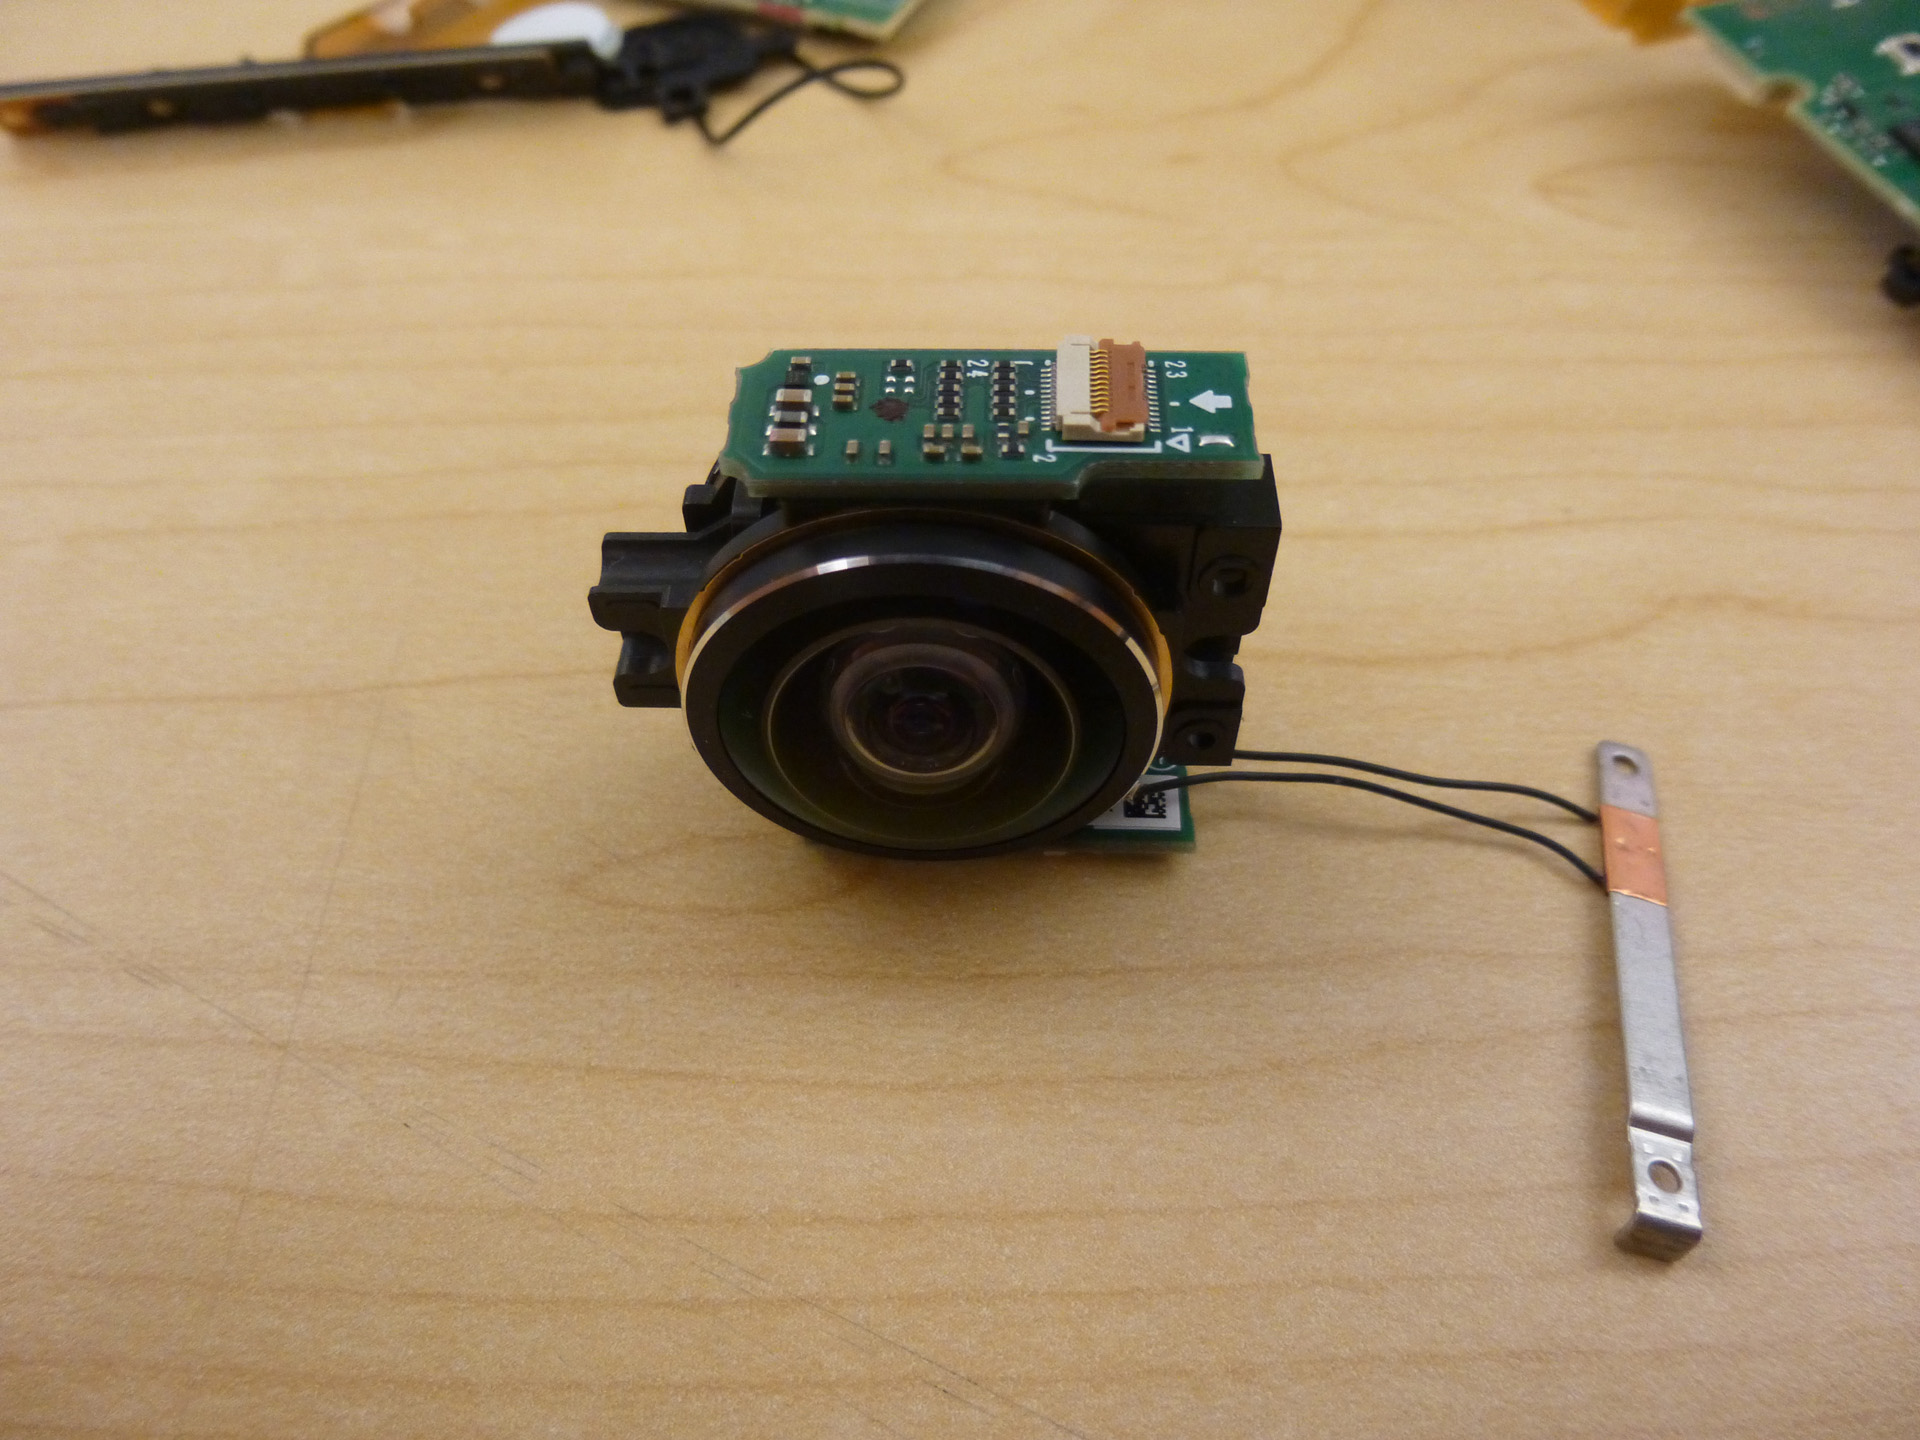
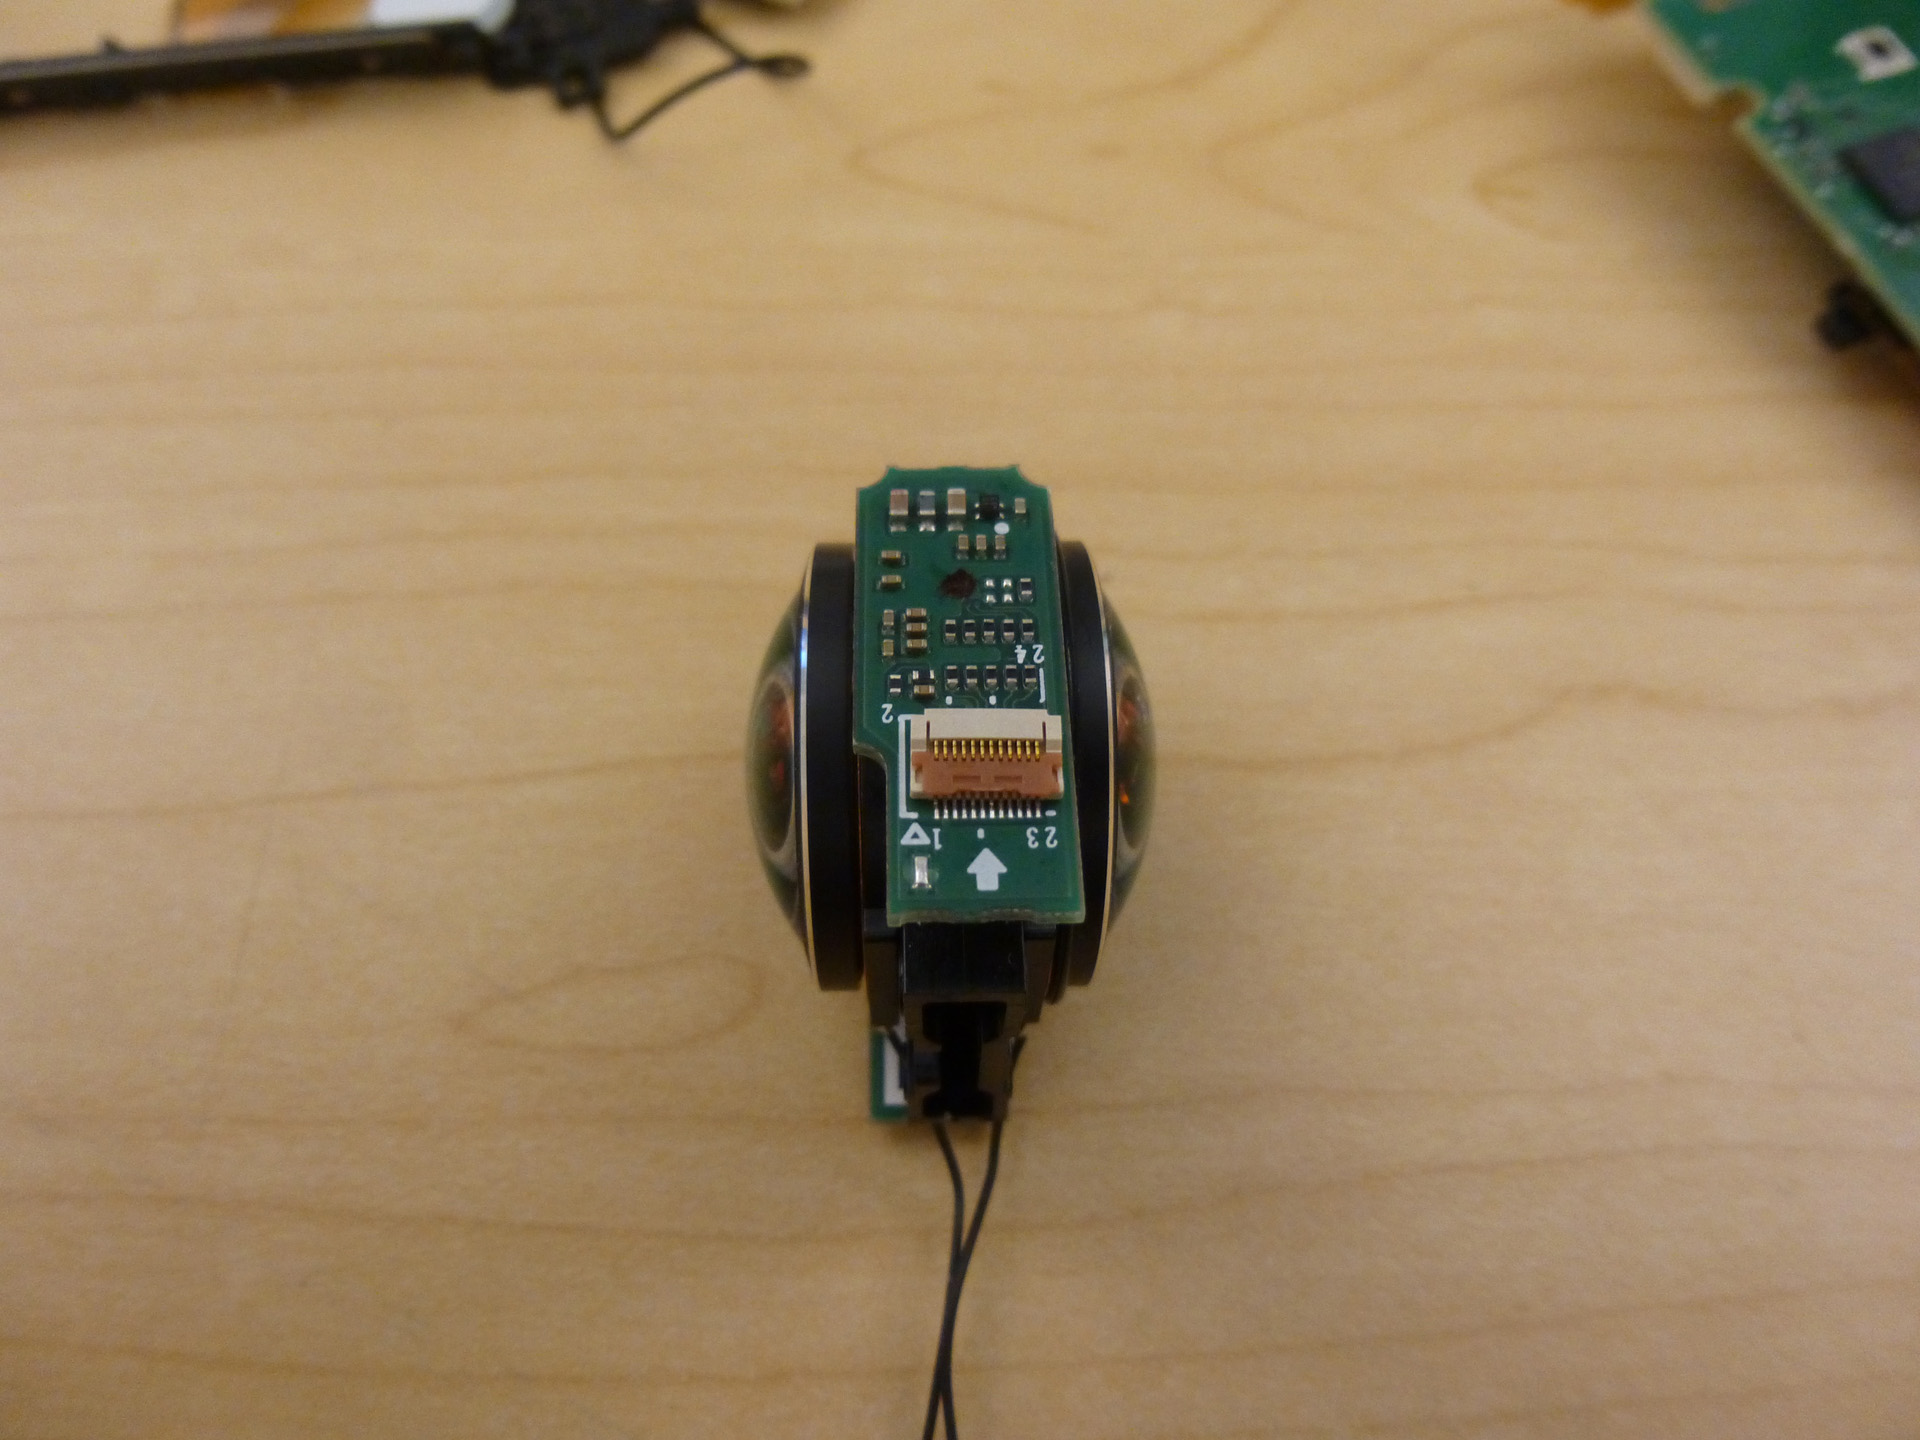
I took the photo below as I though this would be the end of my teardown work of the Ricoh panorama camera. But I was wrong! Please read on as more interesting discoveries are ahead about the well engineered optical / image sensor assembly.
The two circuit boards on the top and bottom of the optical assembly are actually the image sensor boards. I didn’t realize this until I further tear down this assembly. It was hard to image how a sensor is not directly behind a lens, but on the side looking through a diagonal mirror. What a smart design! Since the image sensor is no long taking up the space behind the lens, the back-to-back dual fish eye lenses could get as close to each other as possible. This, presumably, will leave a smallest as possible seam between the two 180° panorama photos. I guess this would make software engineer a much easier job to stitch the photos.
The optical / image sensor module was so well packed that it took me and my colleague some serious efforts to open it up. I noticed that some glue was used for the packaging, so the teardown of this assembly is an irreversible process. It was causing permanent damage to the assembly. So think twice before you try this.
The image sensor got knocked off first. I wasn’t able to tell its maker or the model number. Given the limited number of pins on the connector, I guess it is a rolling shutter sensor.
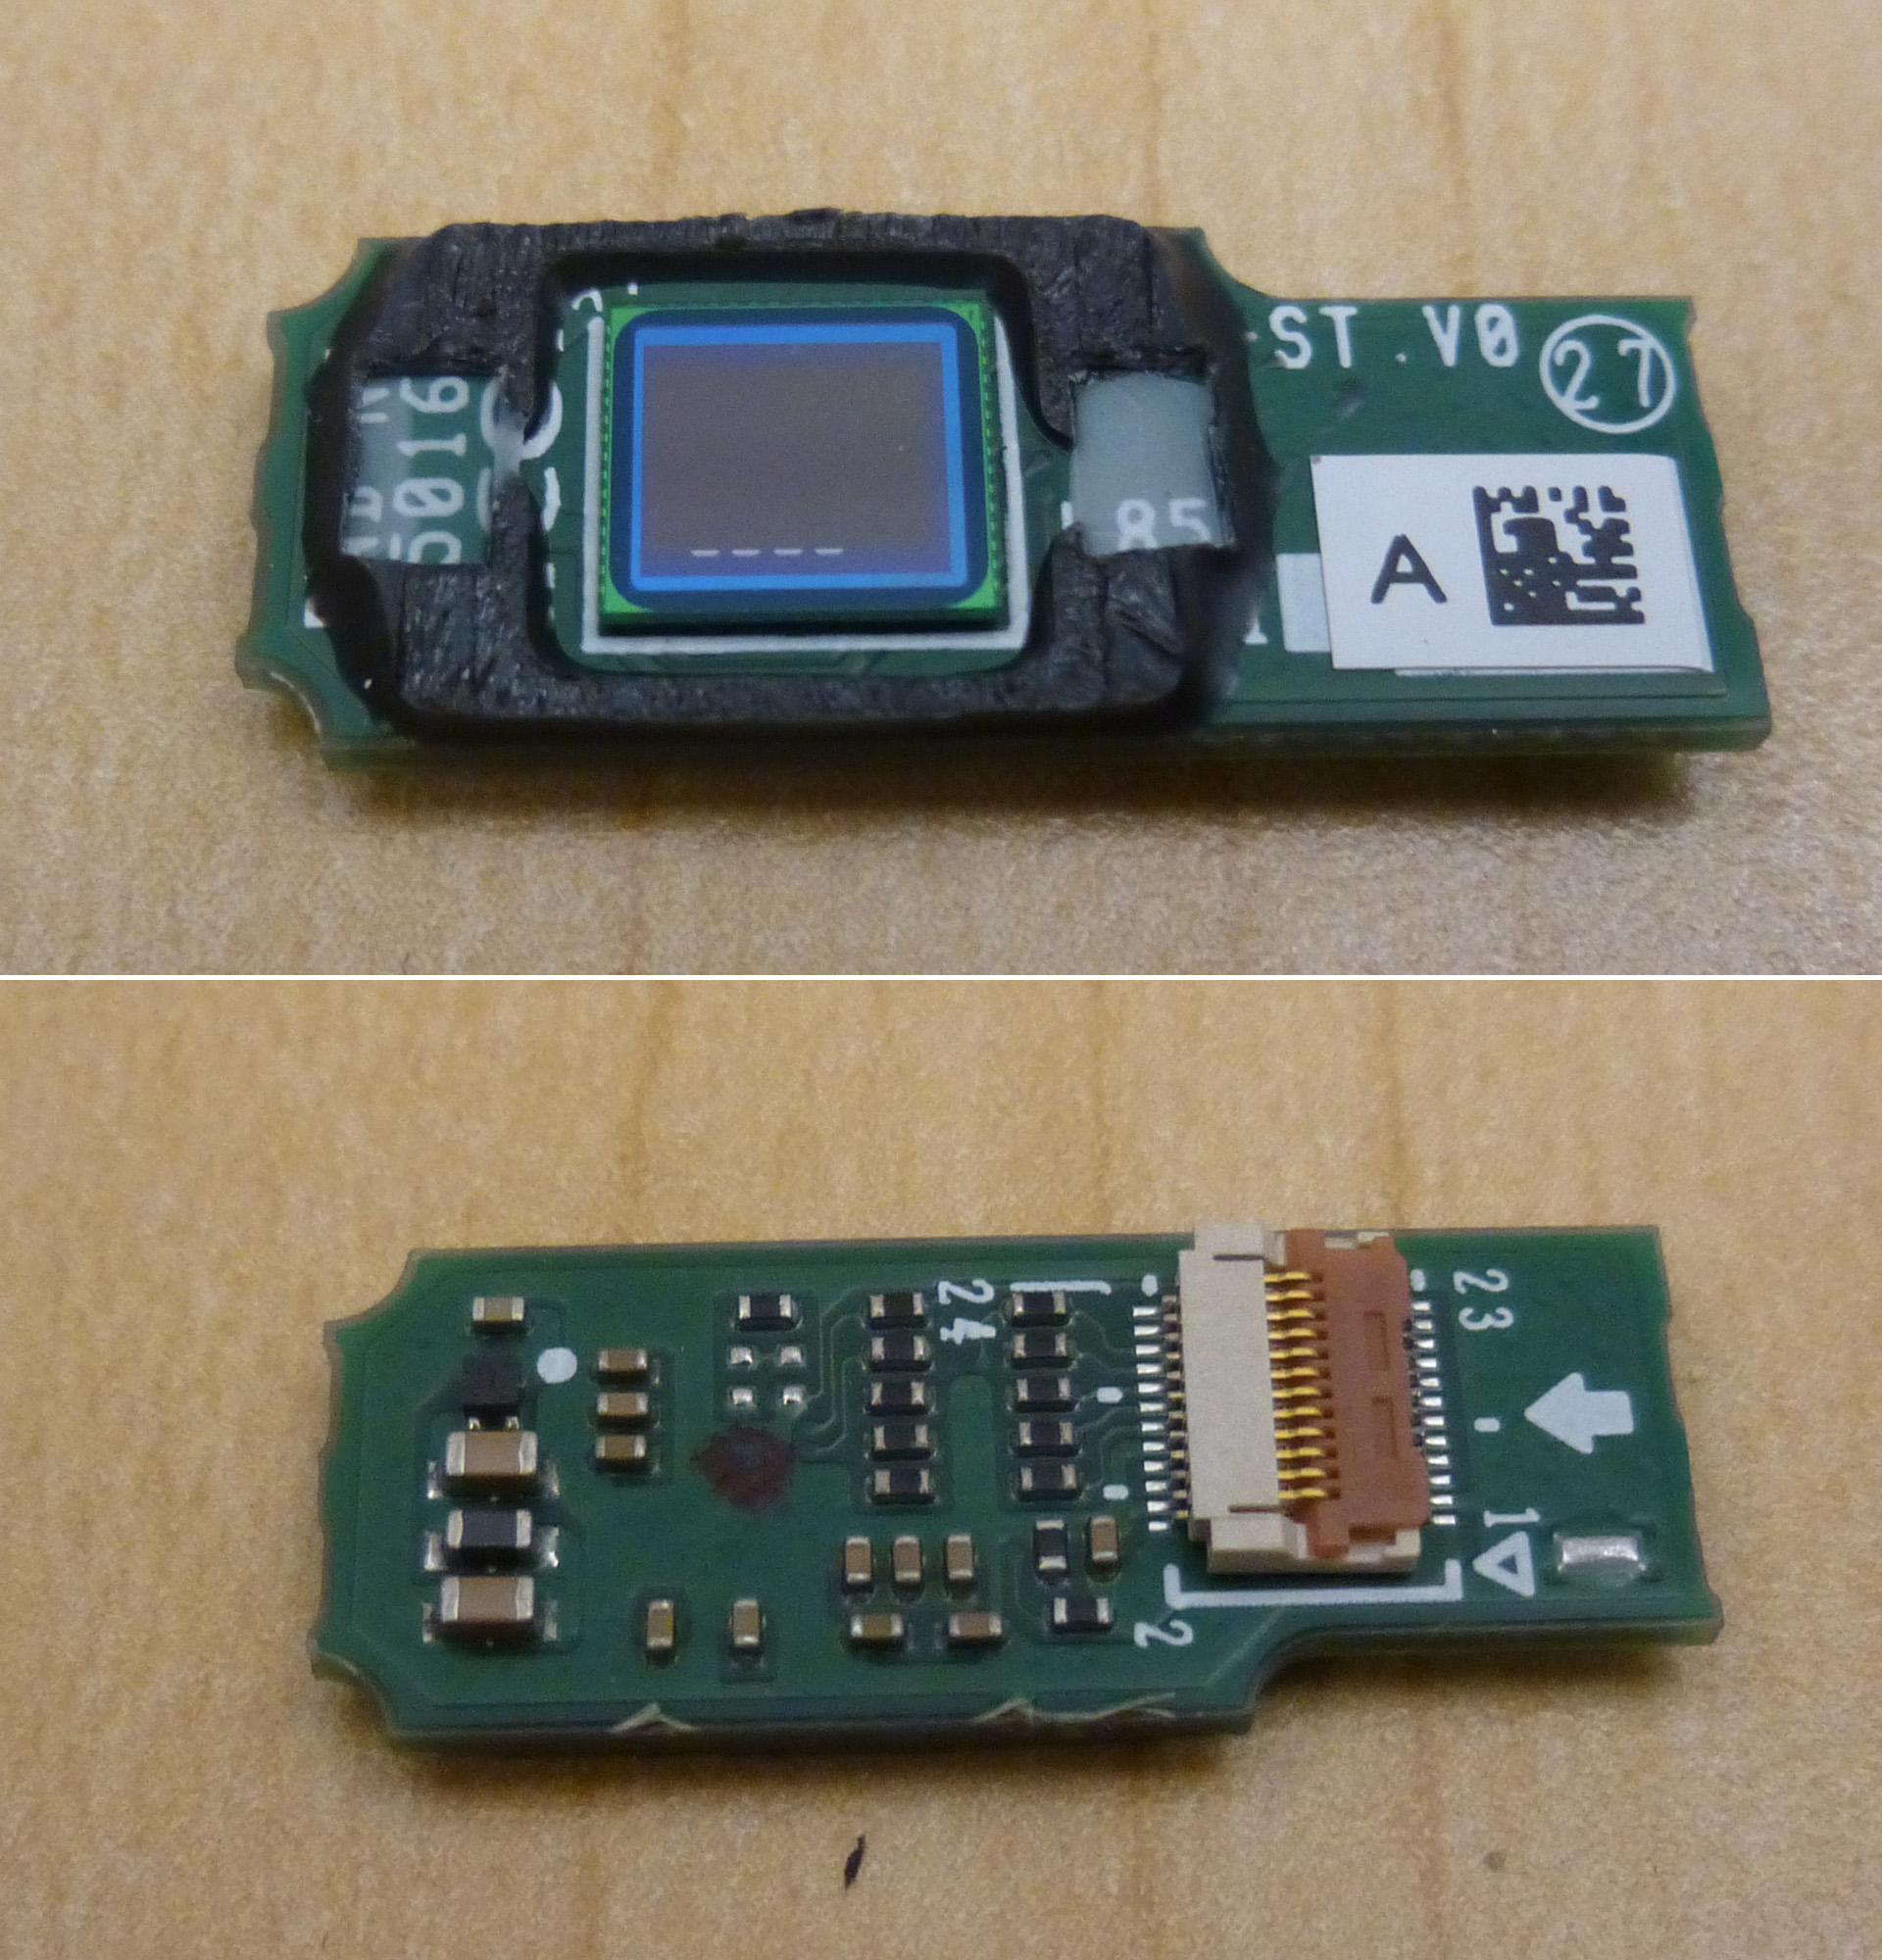
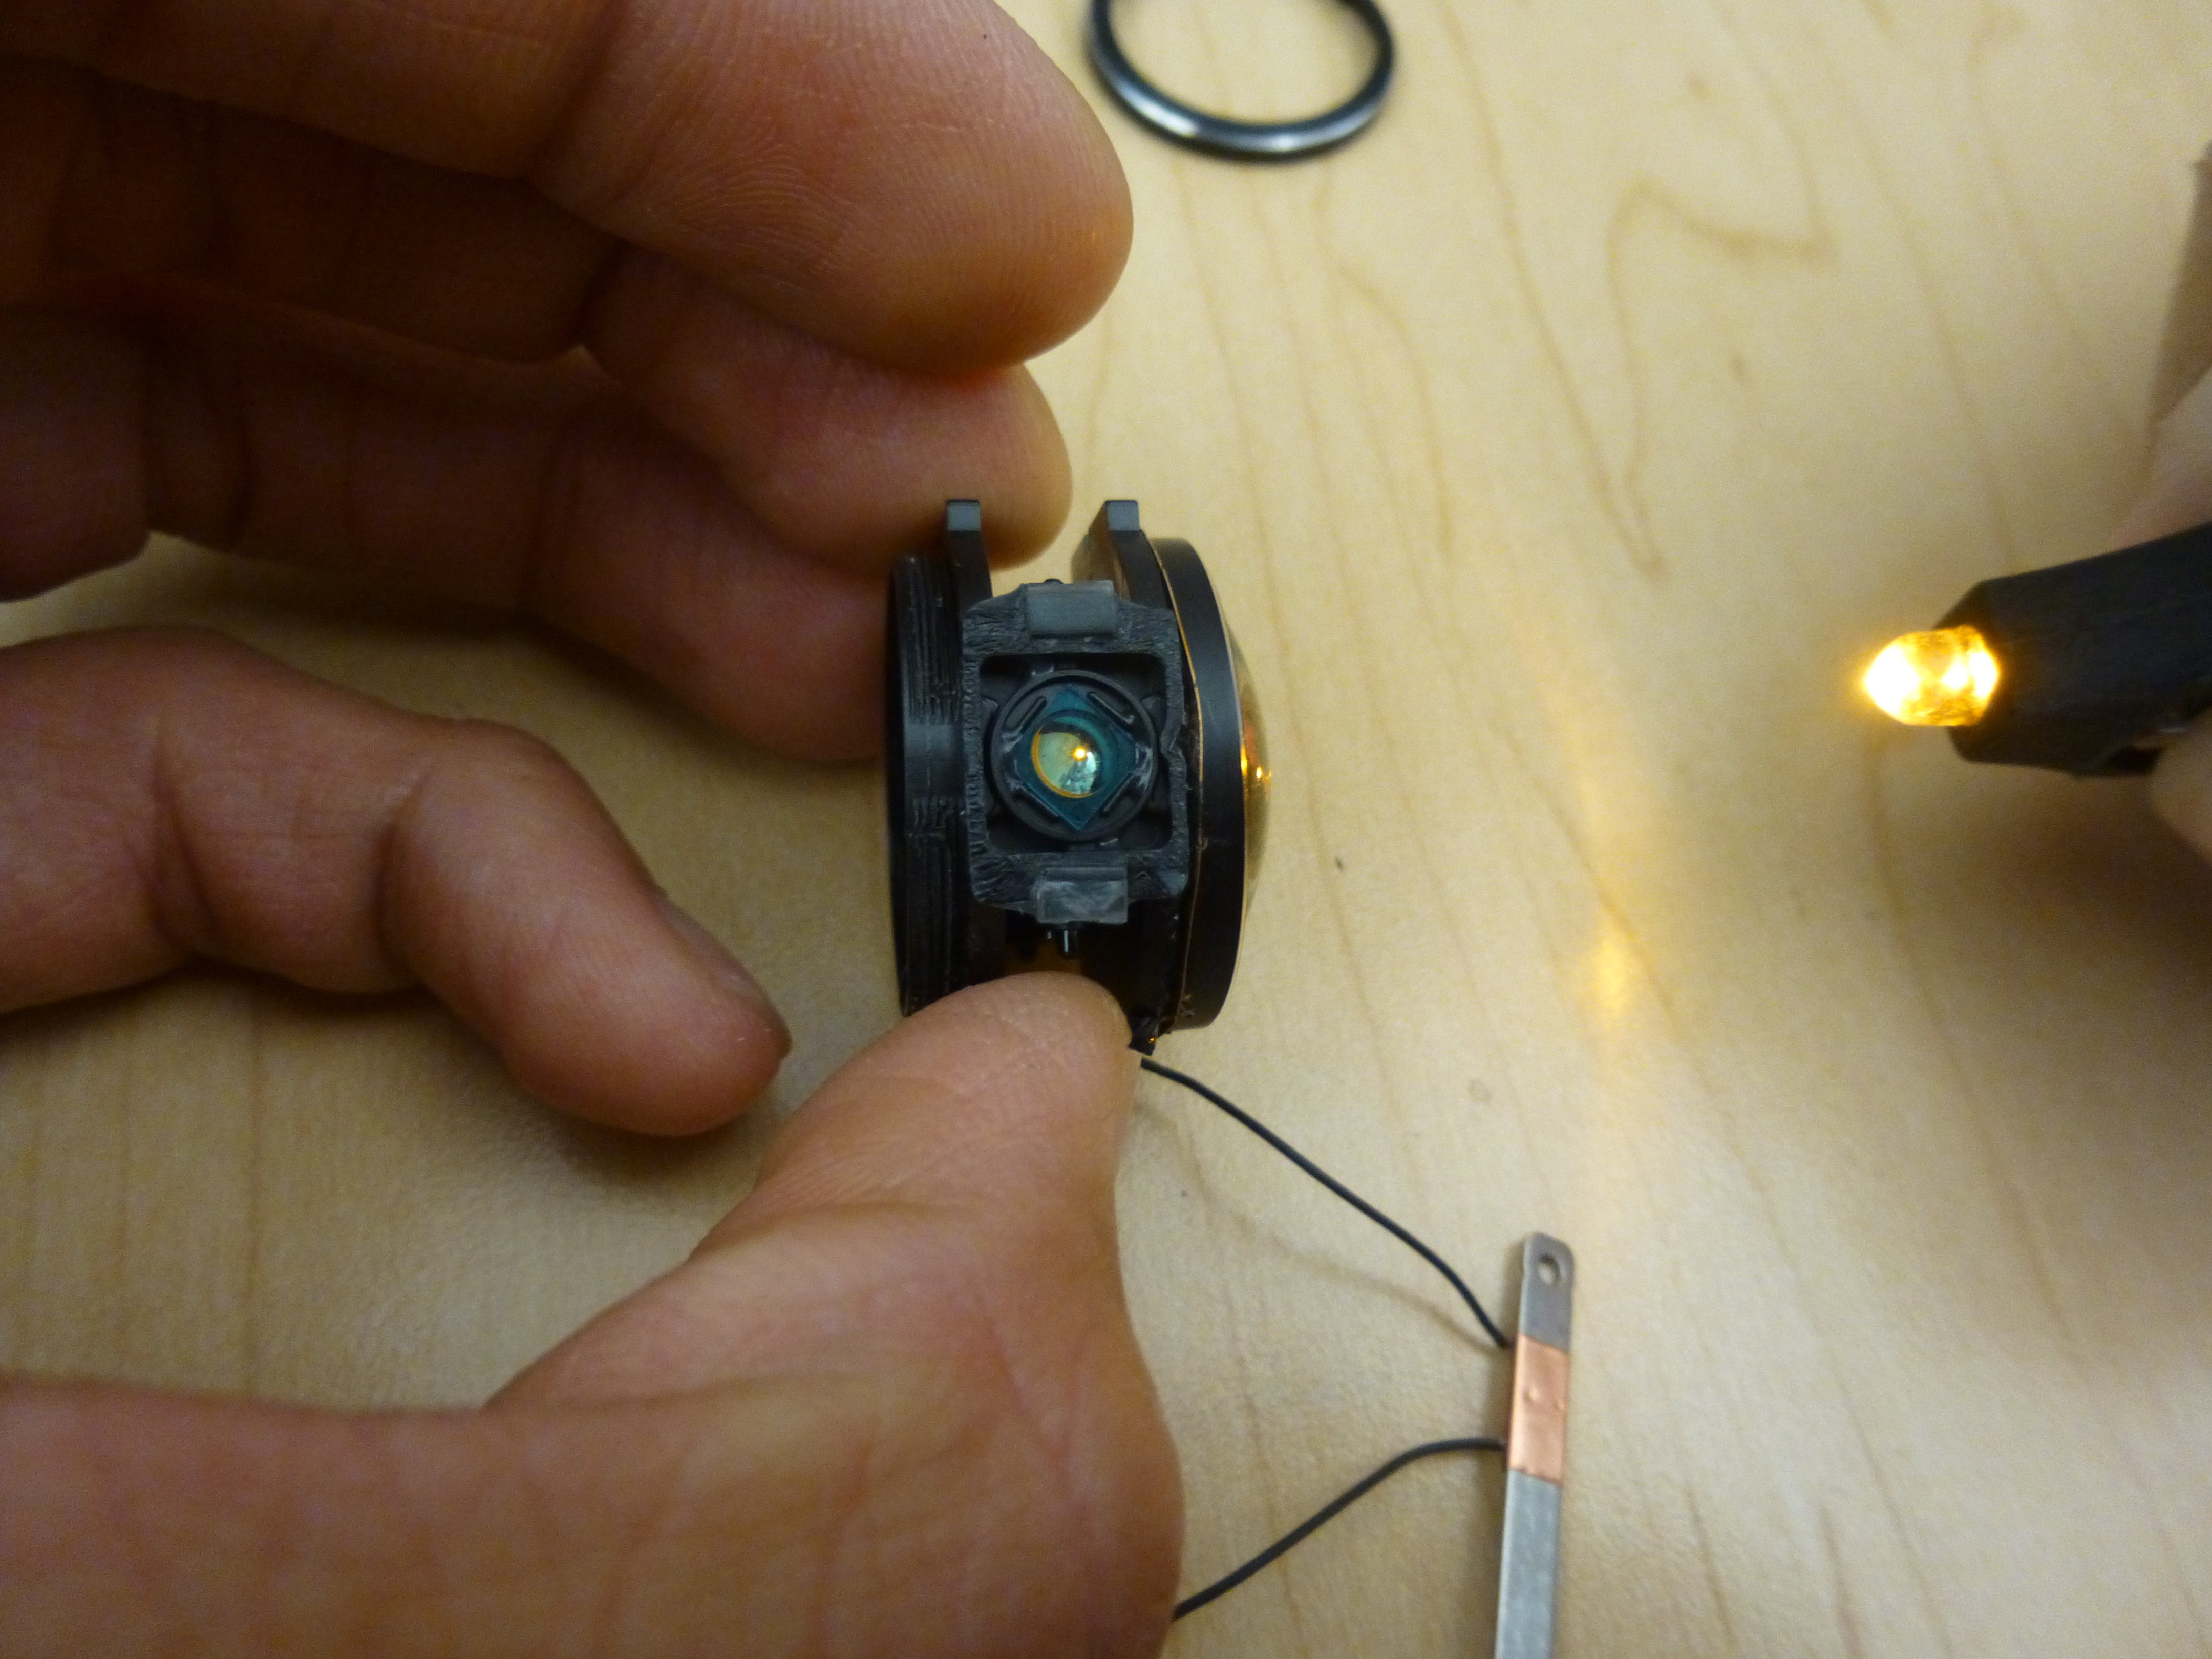
Once the sensor was removed, I was able to prove my assumption of its right angle optical path. As you can see from the photo below, I shined some yellow light on the right side, and the color showed up on the top. Same thing happened on the left side where the image was reflected down. There must be some sort of double-sided mirror placed in diagonal direction.
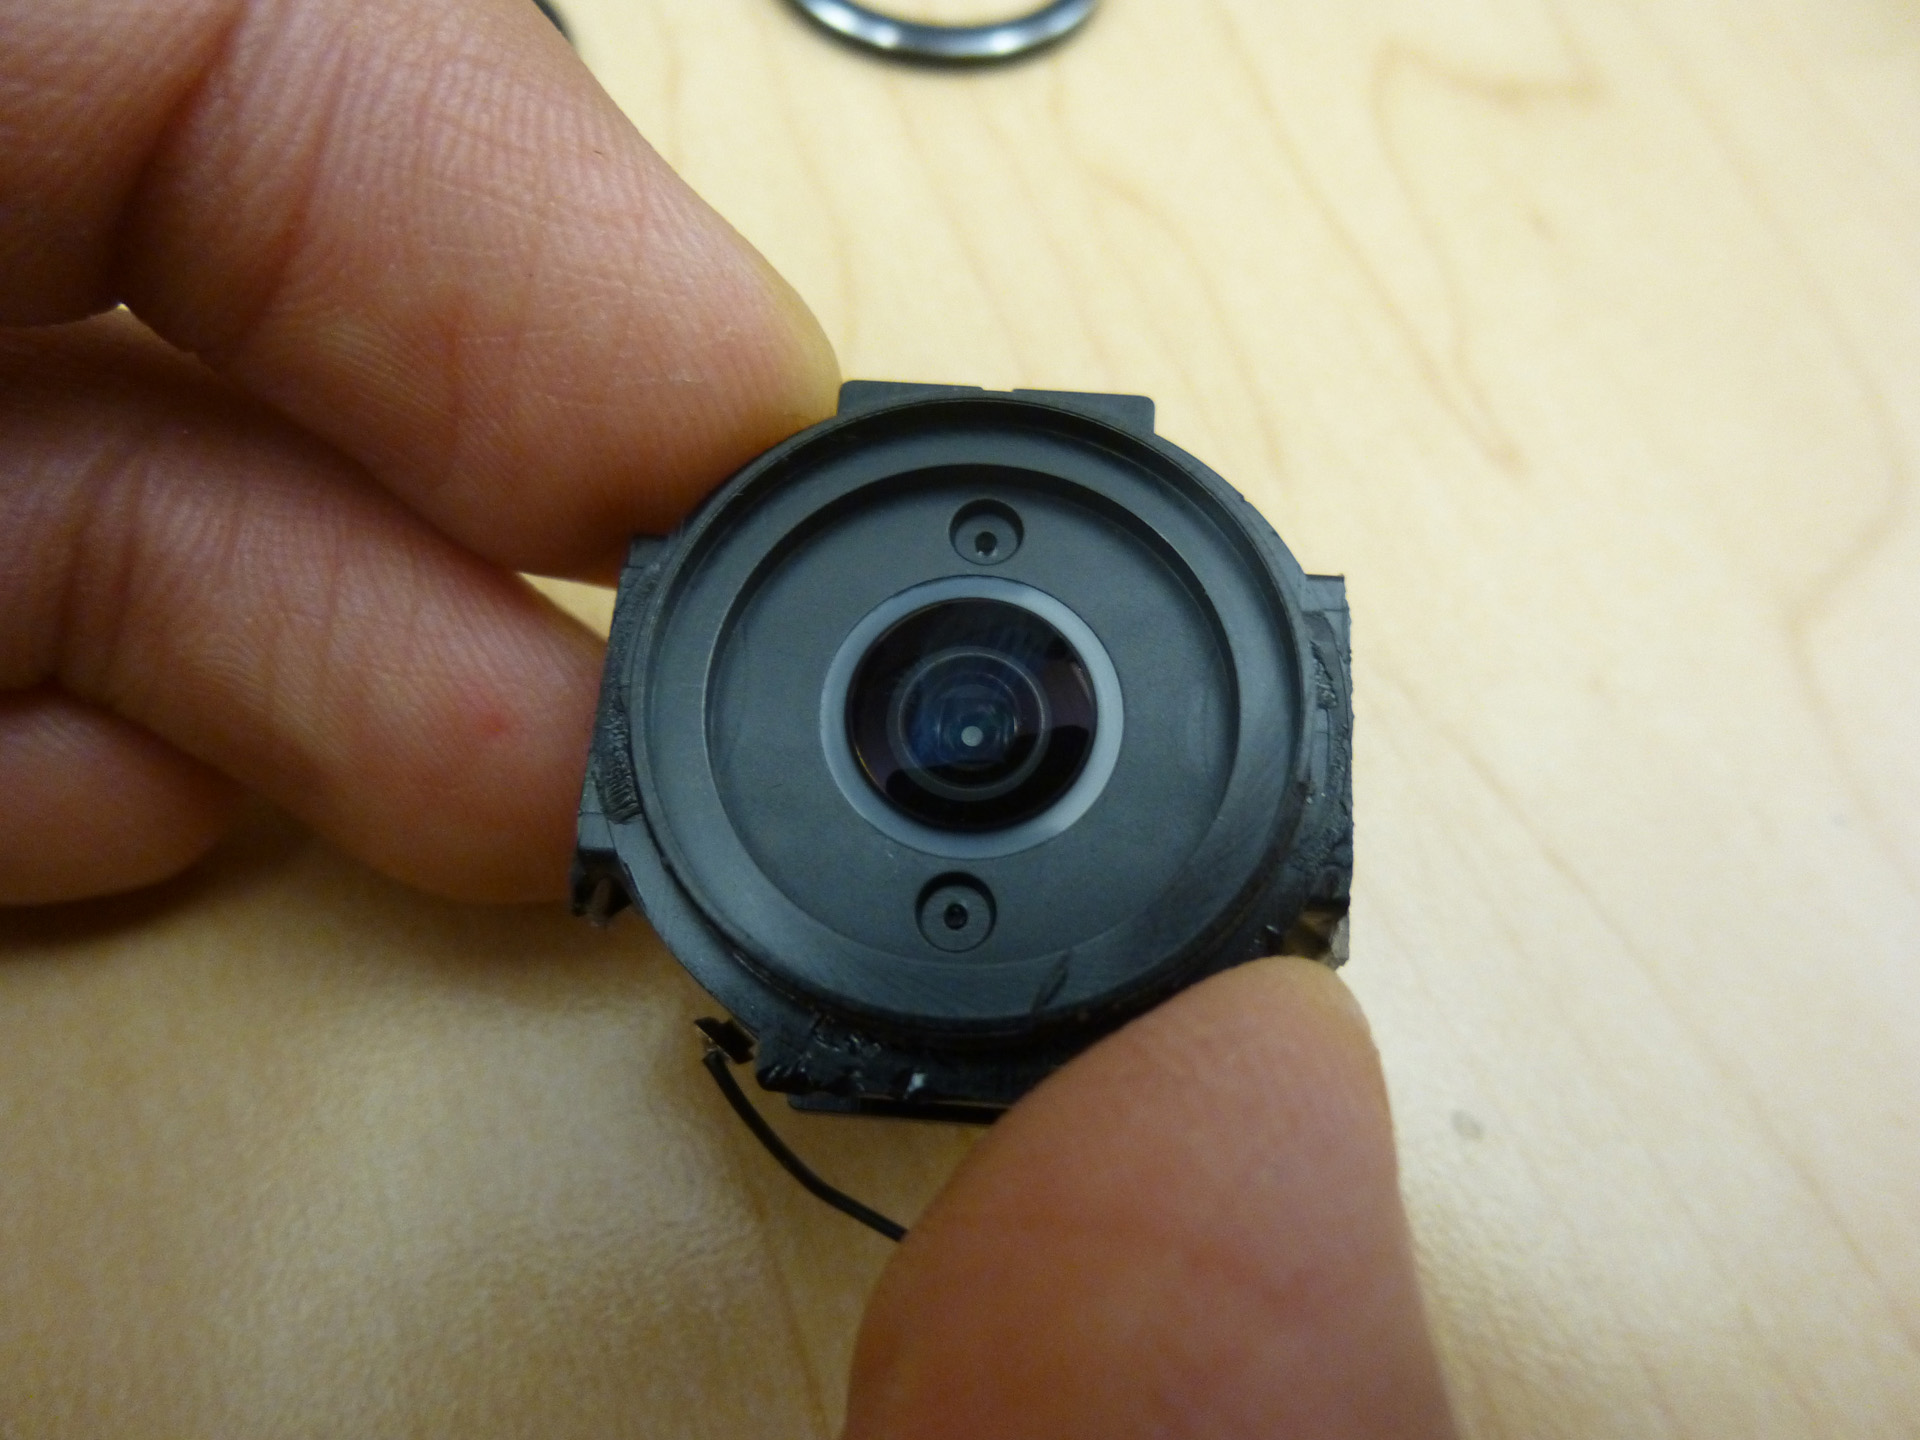
After the out-most convex lens was gone, we were able to take a further step into the heart of the optical module. But we were stopped by another piece of lens.
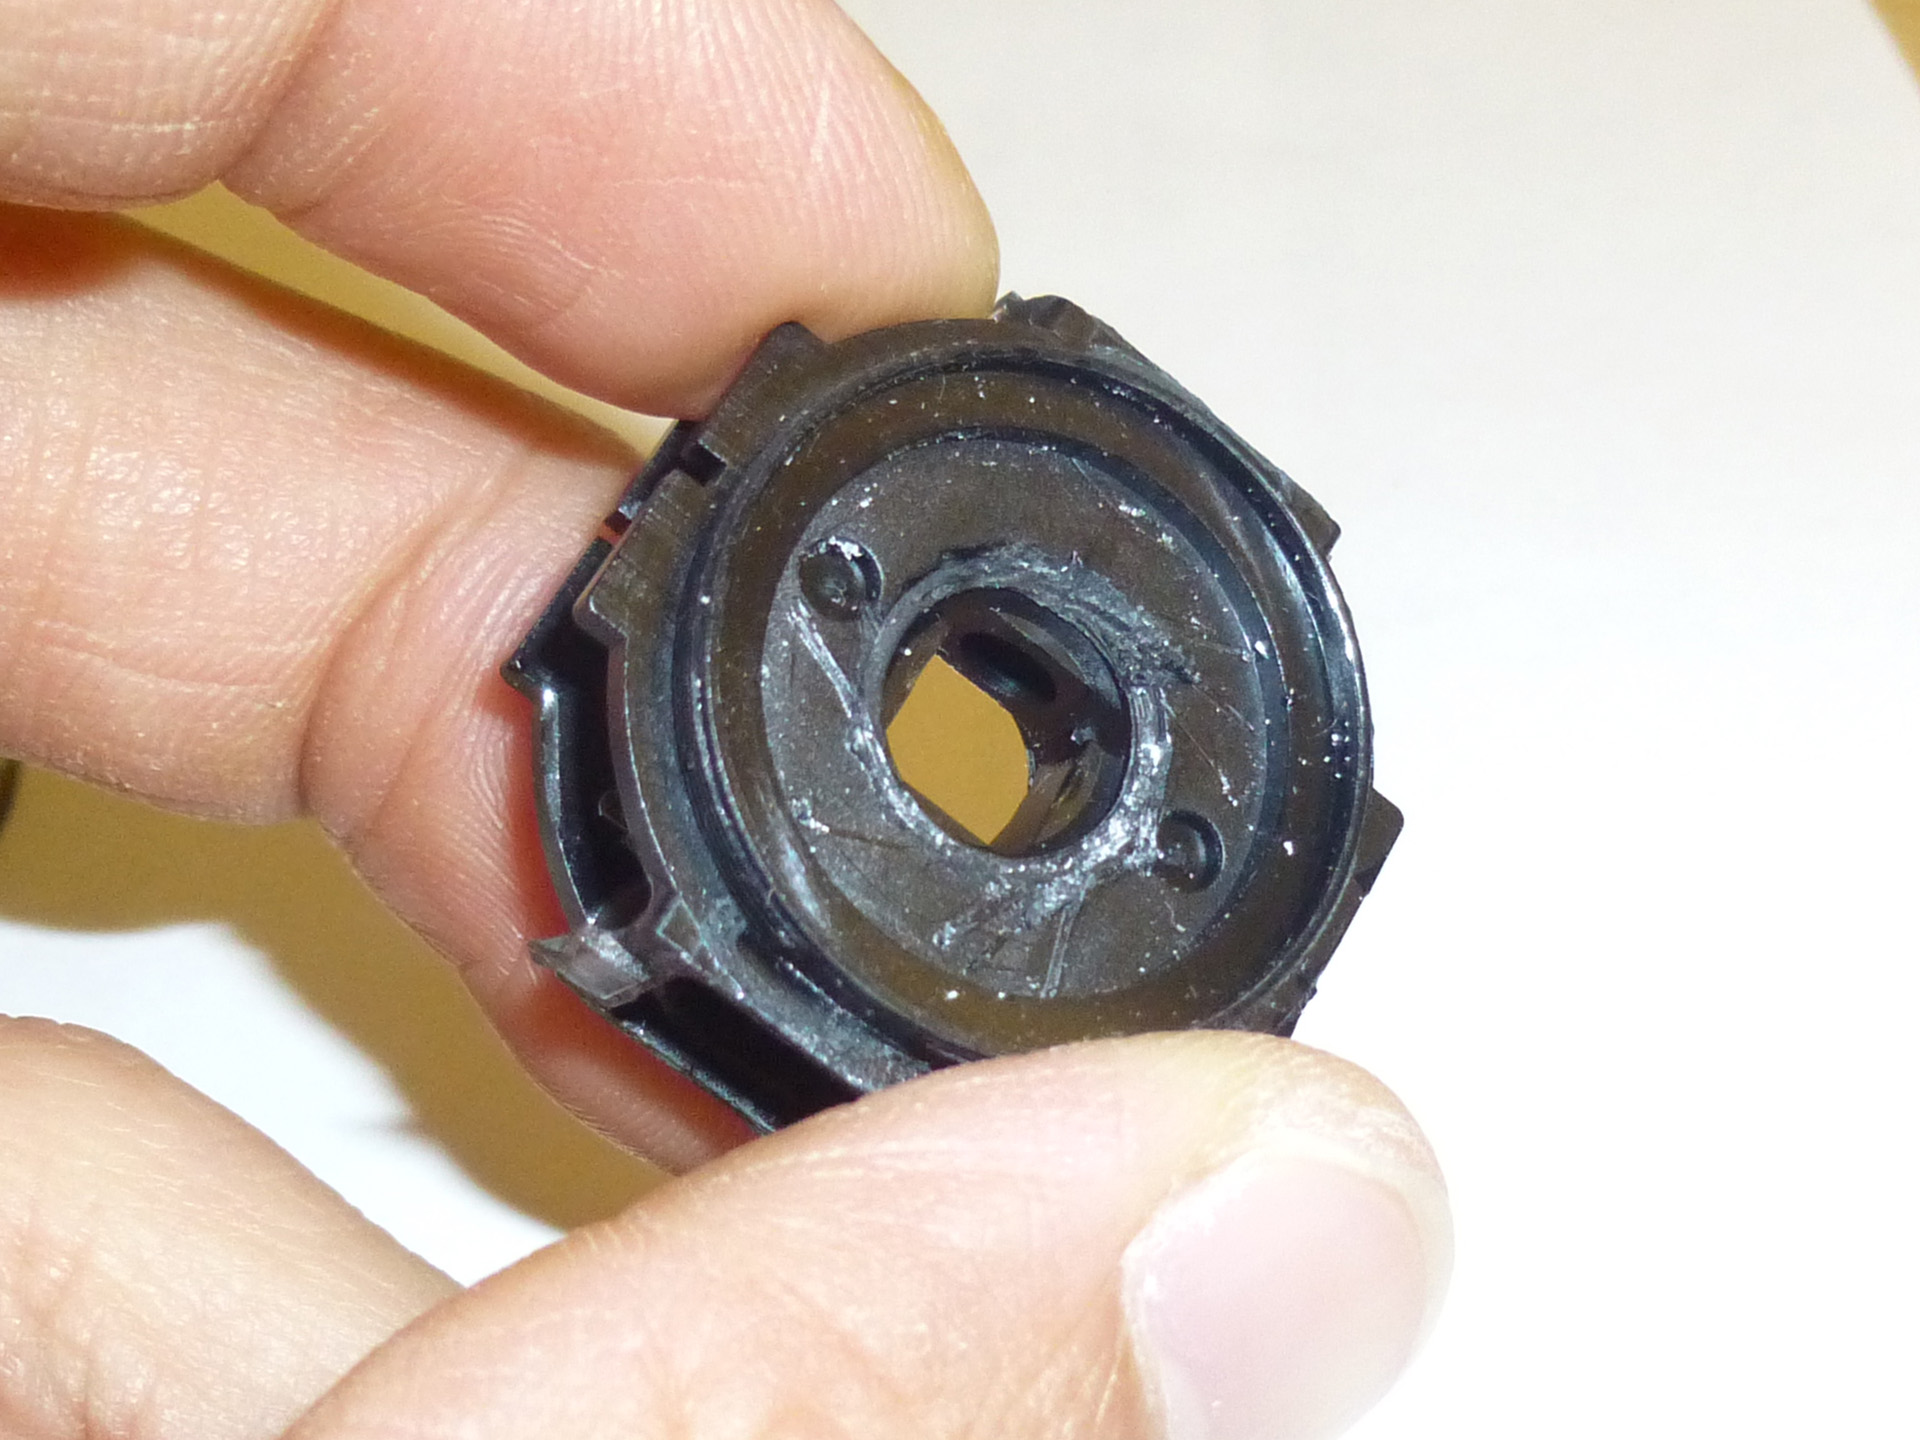
After another desperate digging, knocking and poking, the 2nd lens was finally gone. And the core of the optical module was just a friction of an inch away.
Finally we were able to grab the core: a beam splitter like cube that is made of two prisms glued together, forming a double-sided mirror on its interfacing surface (45°).
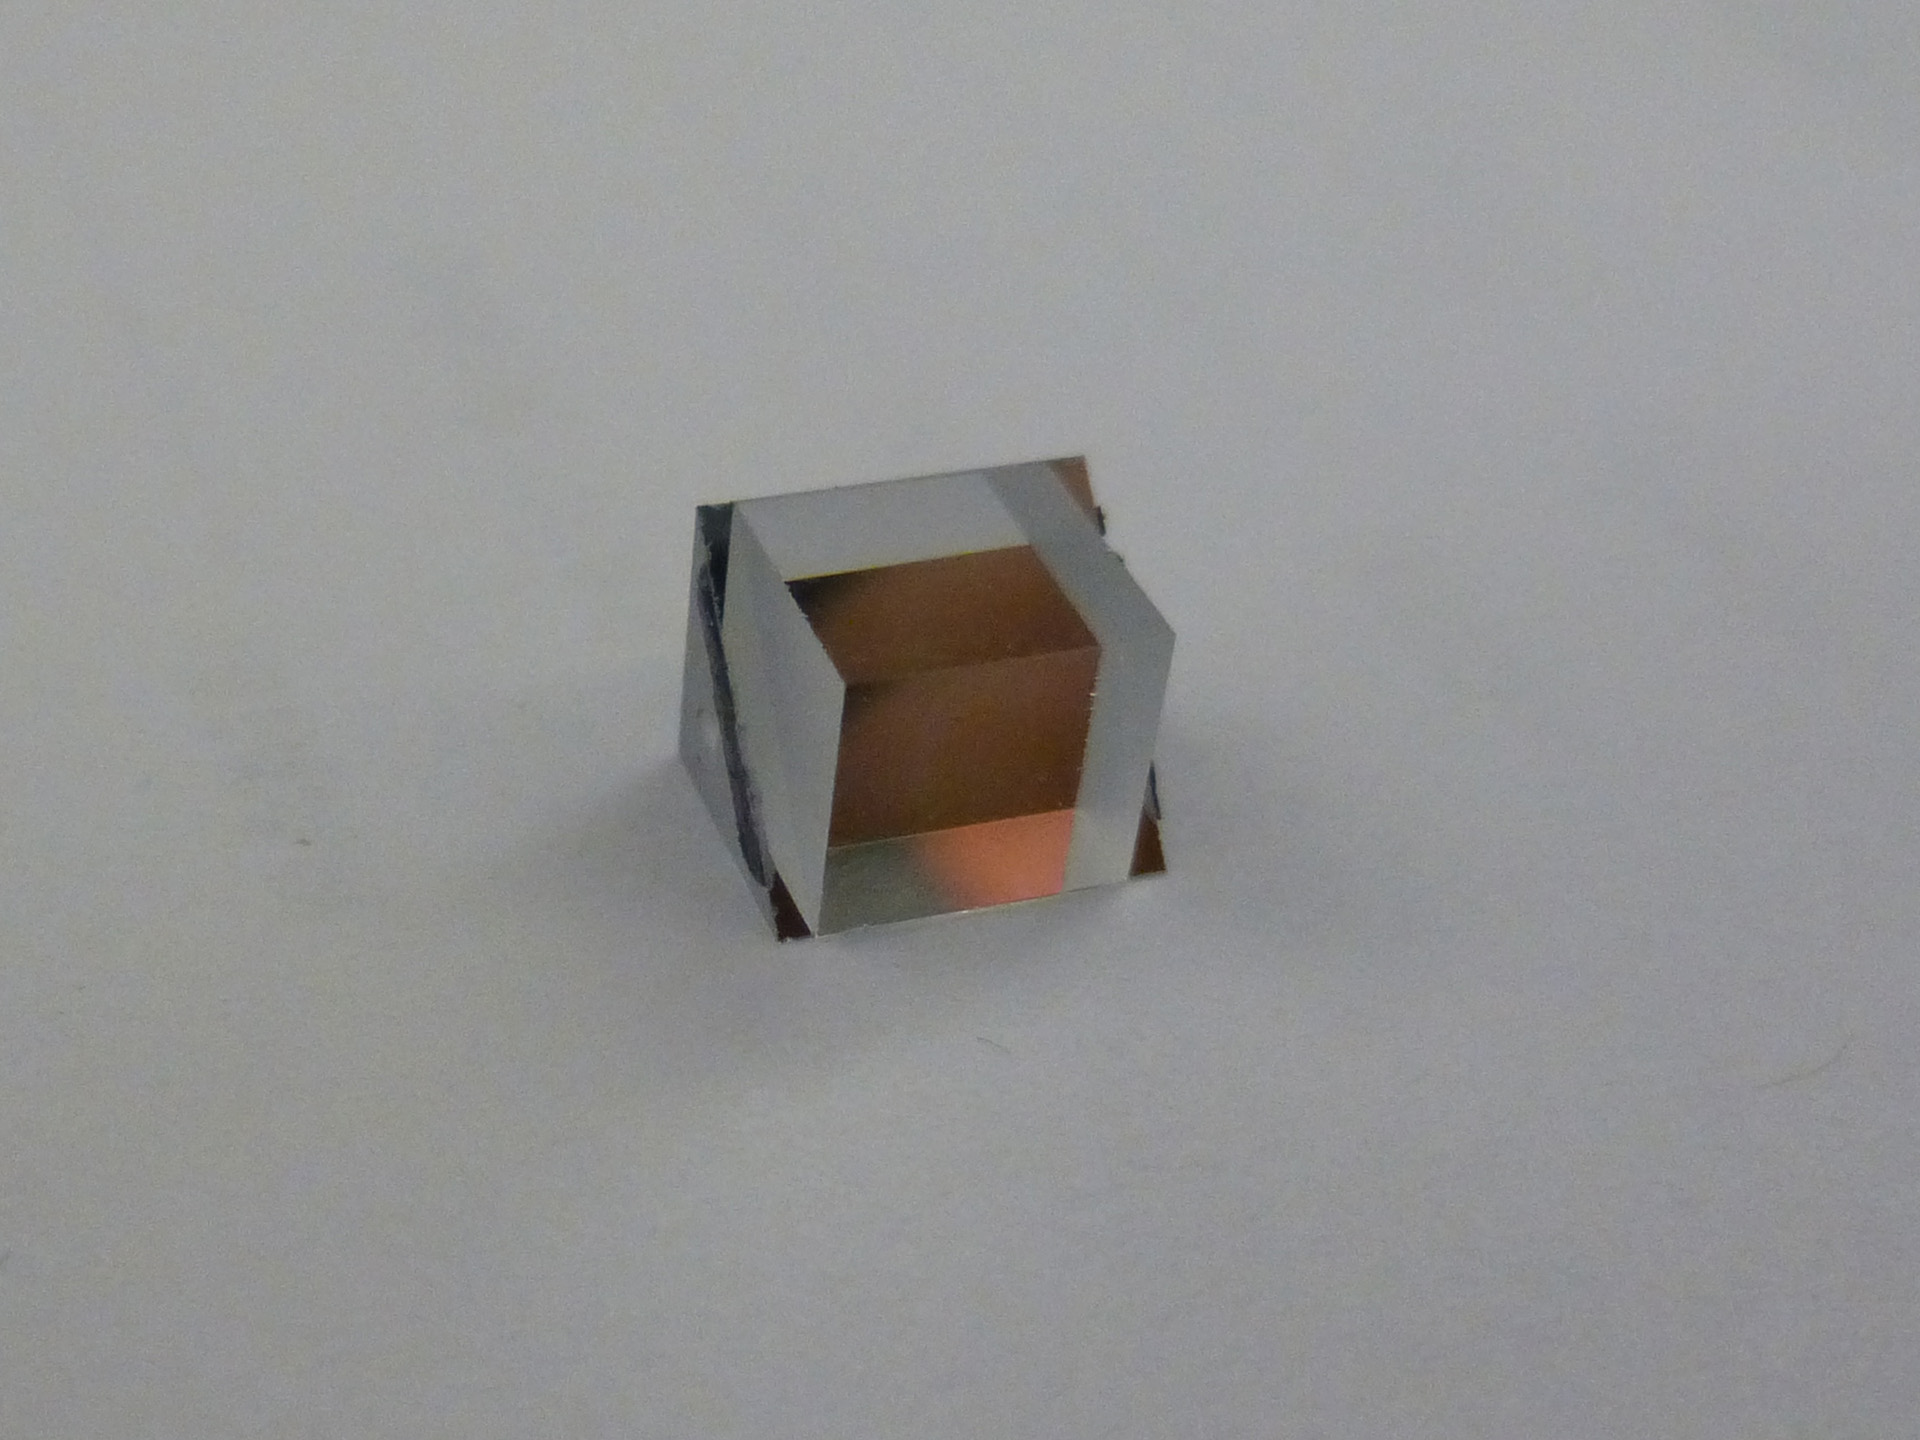
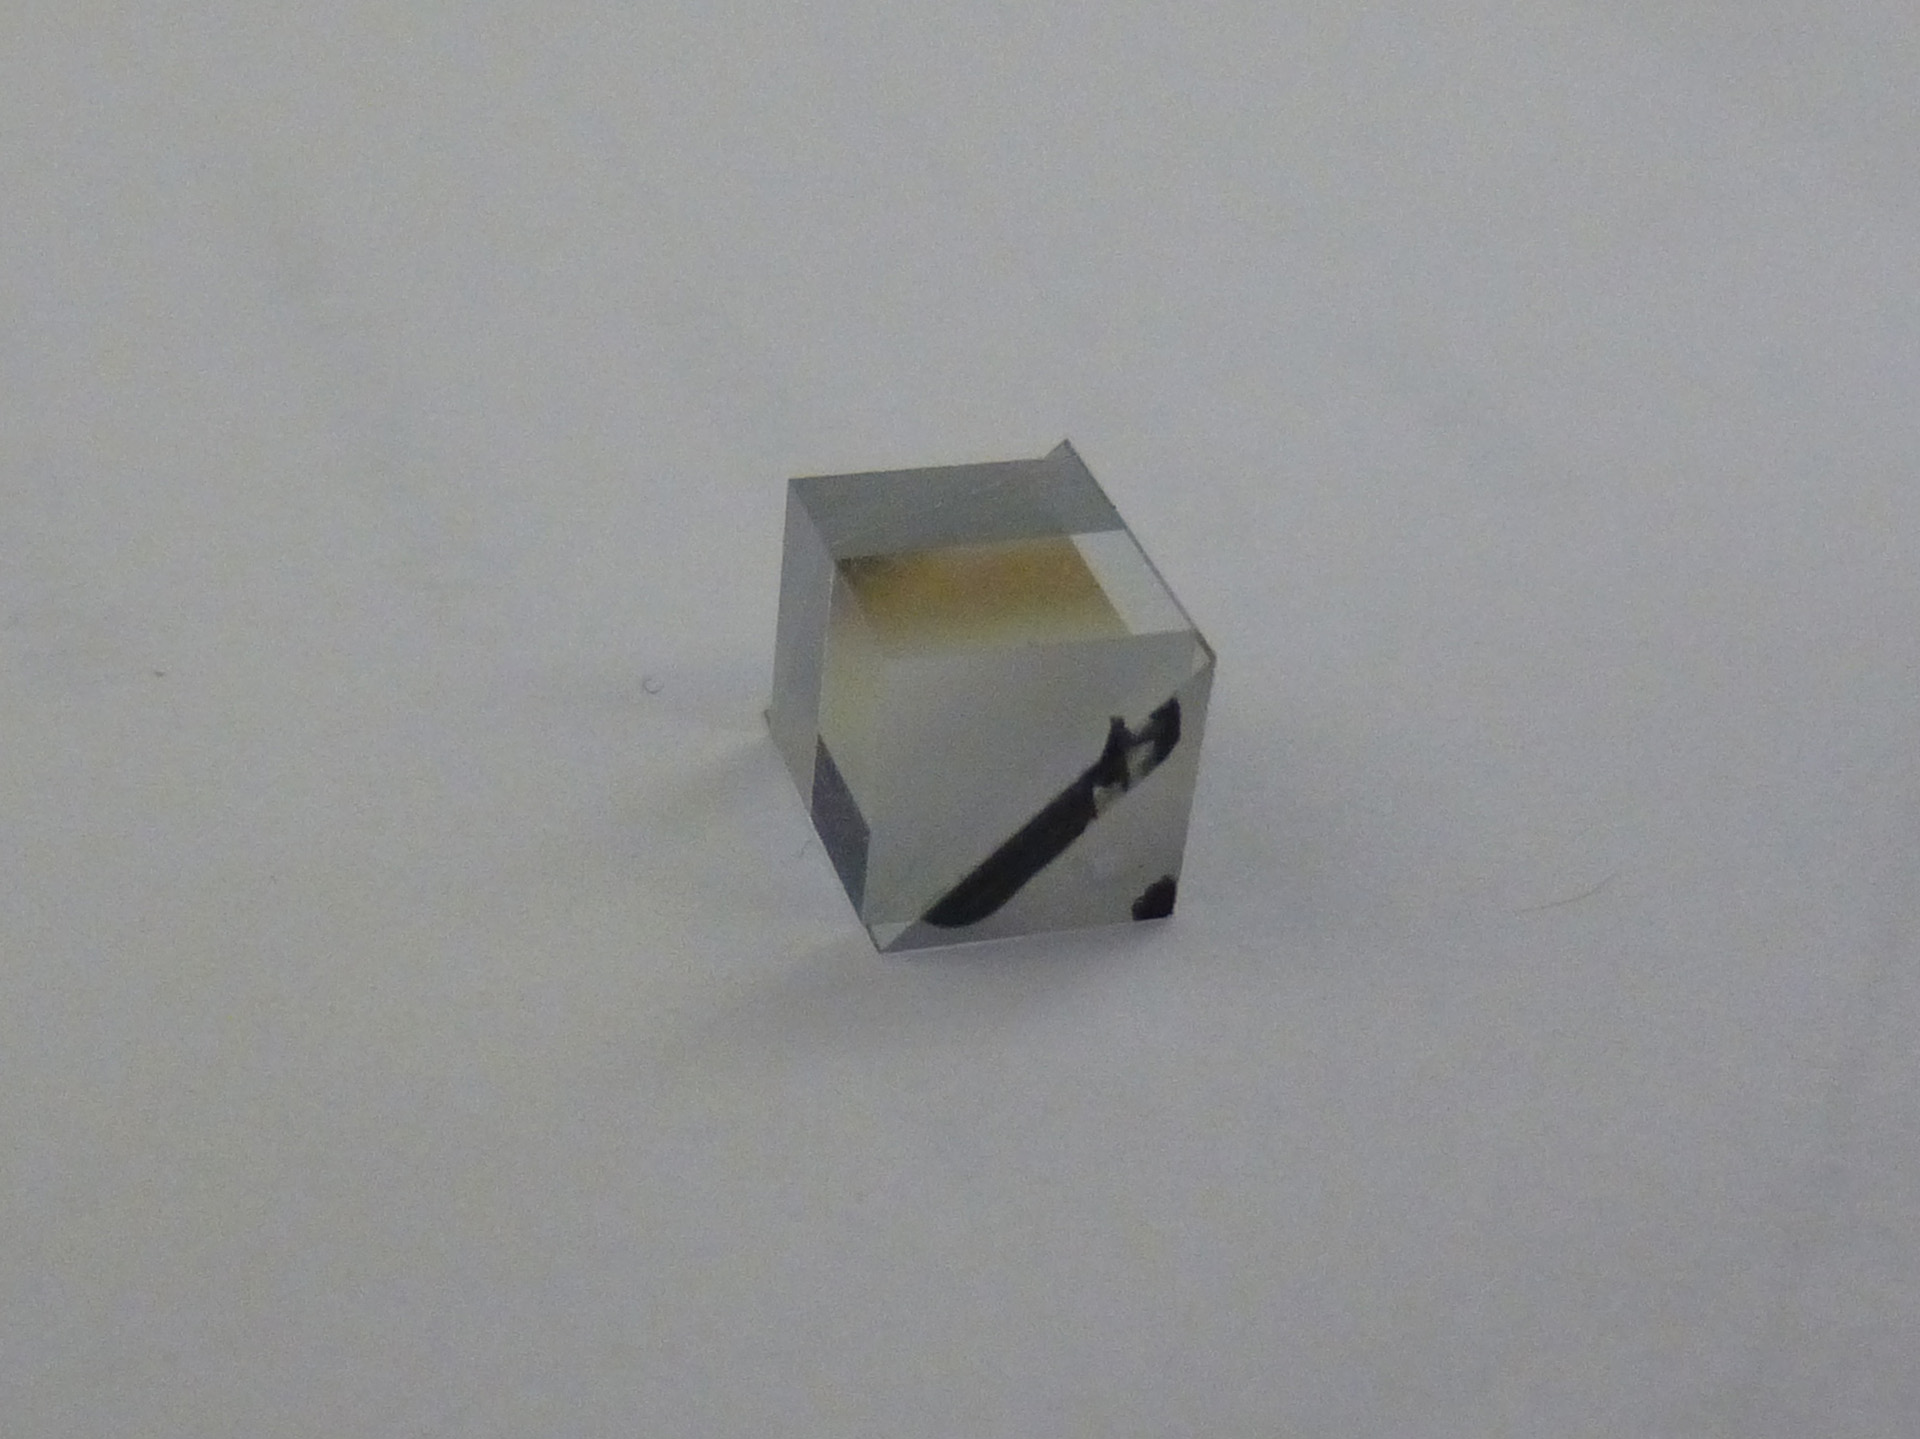
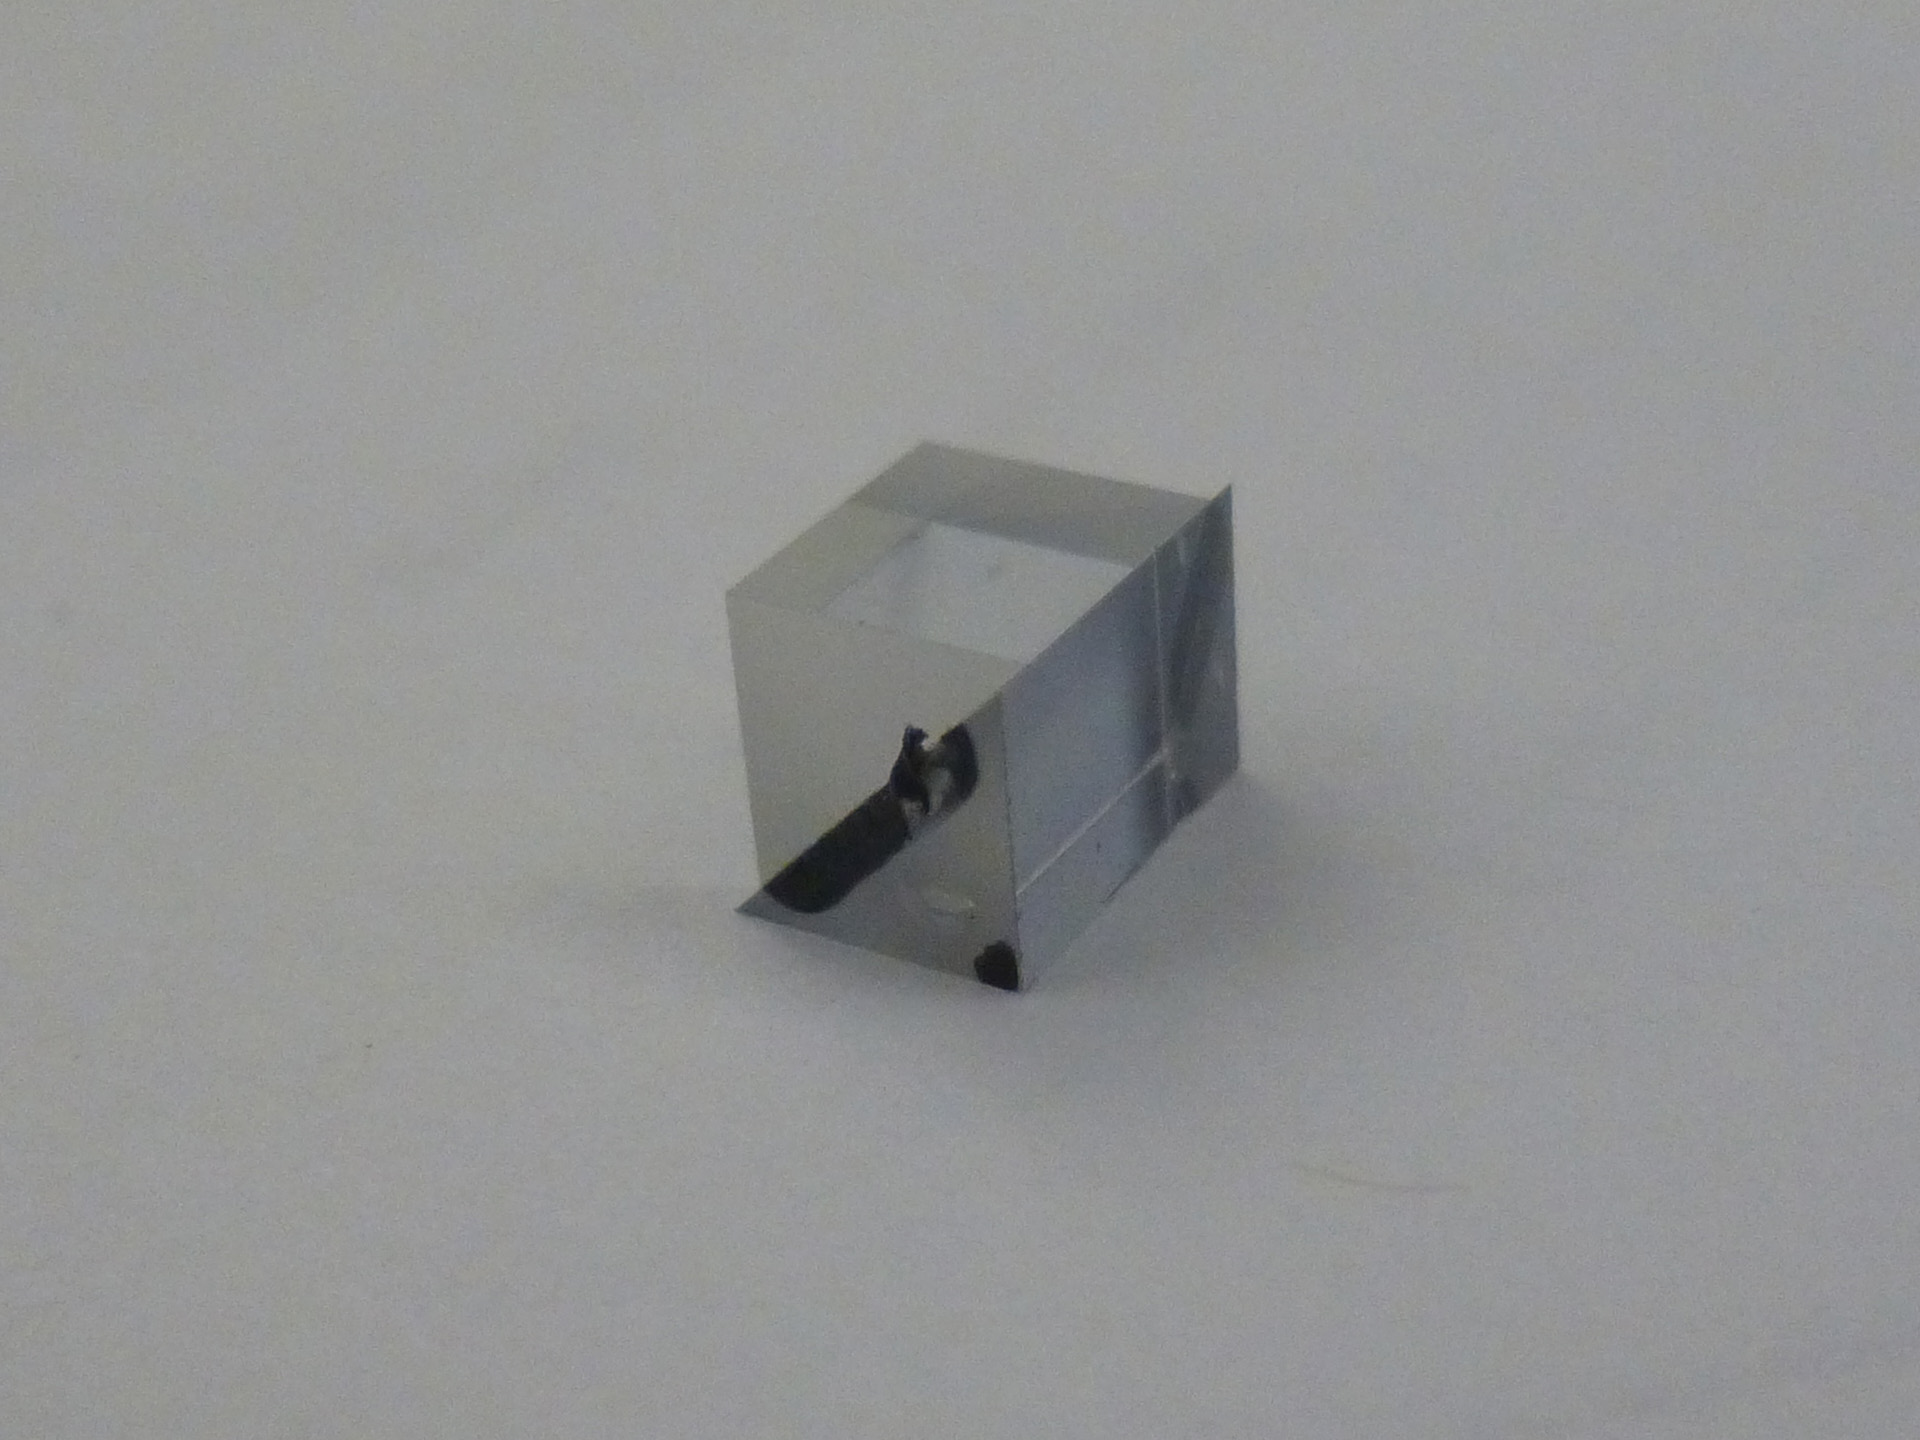
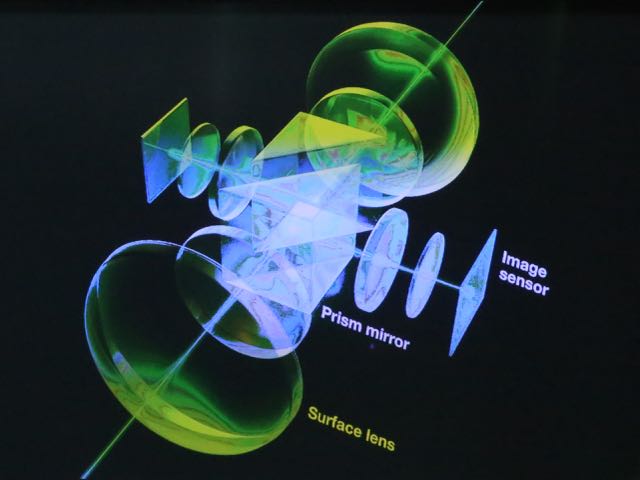
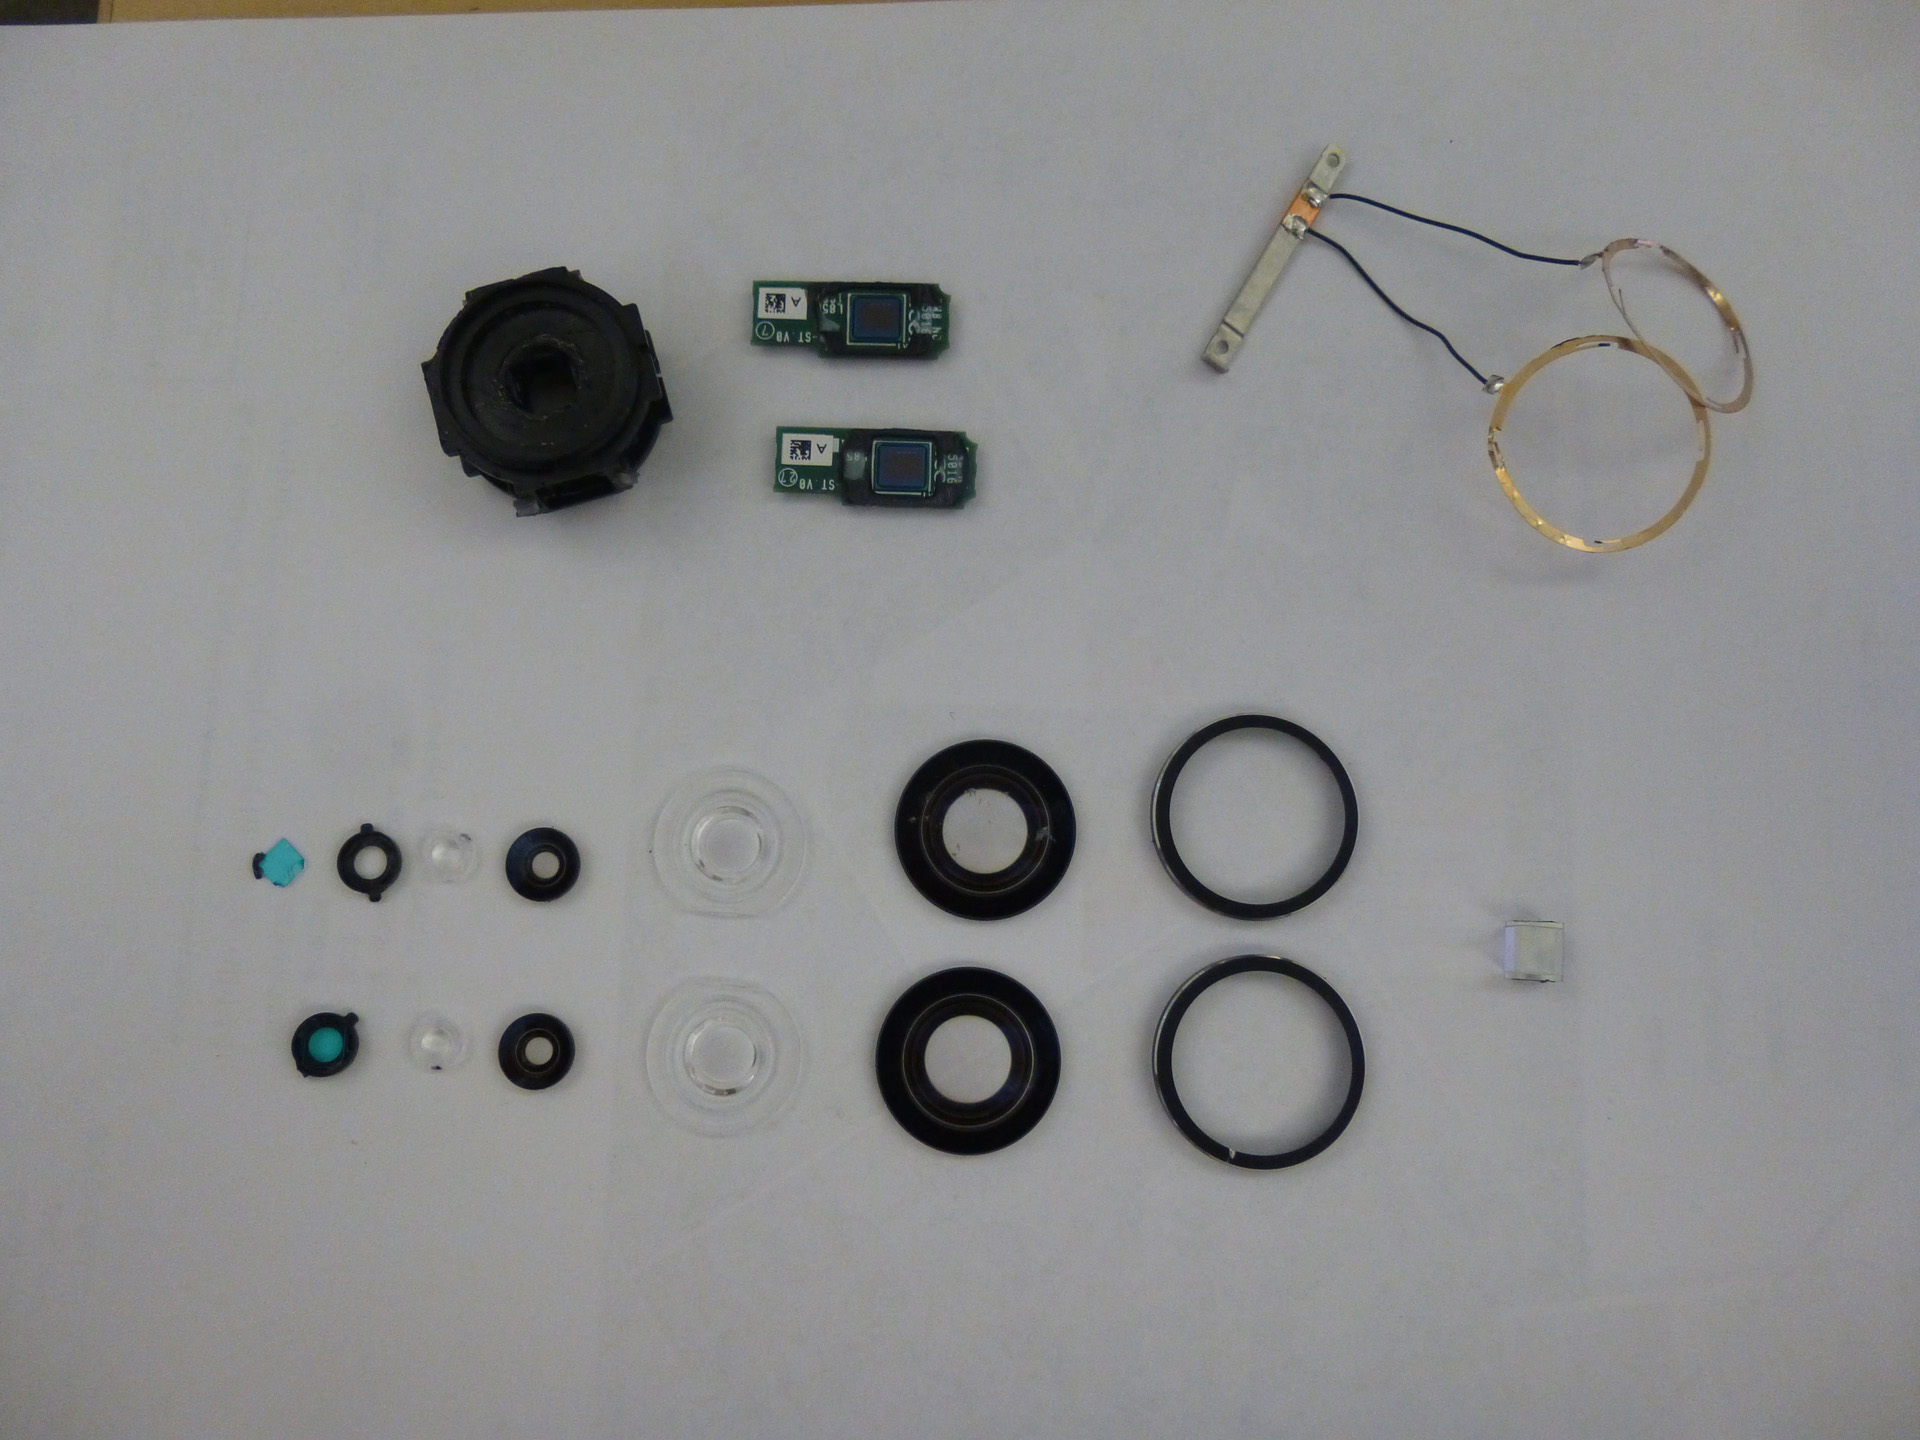
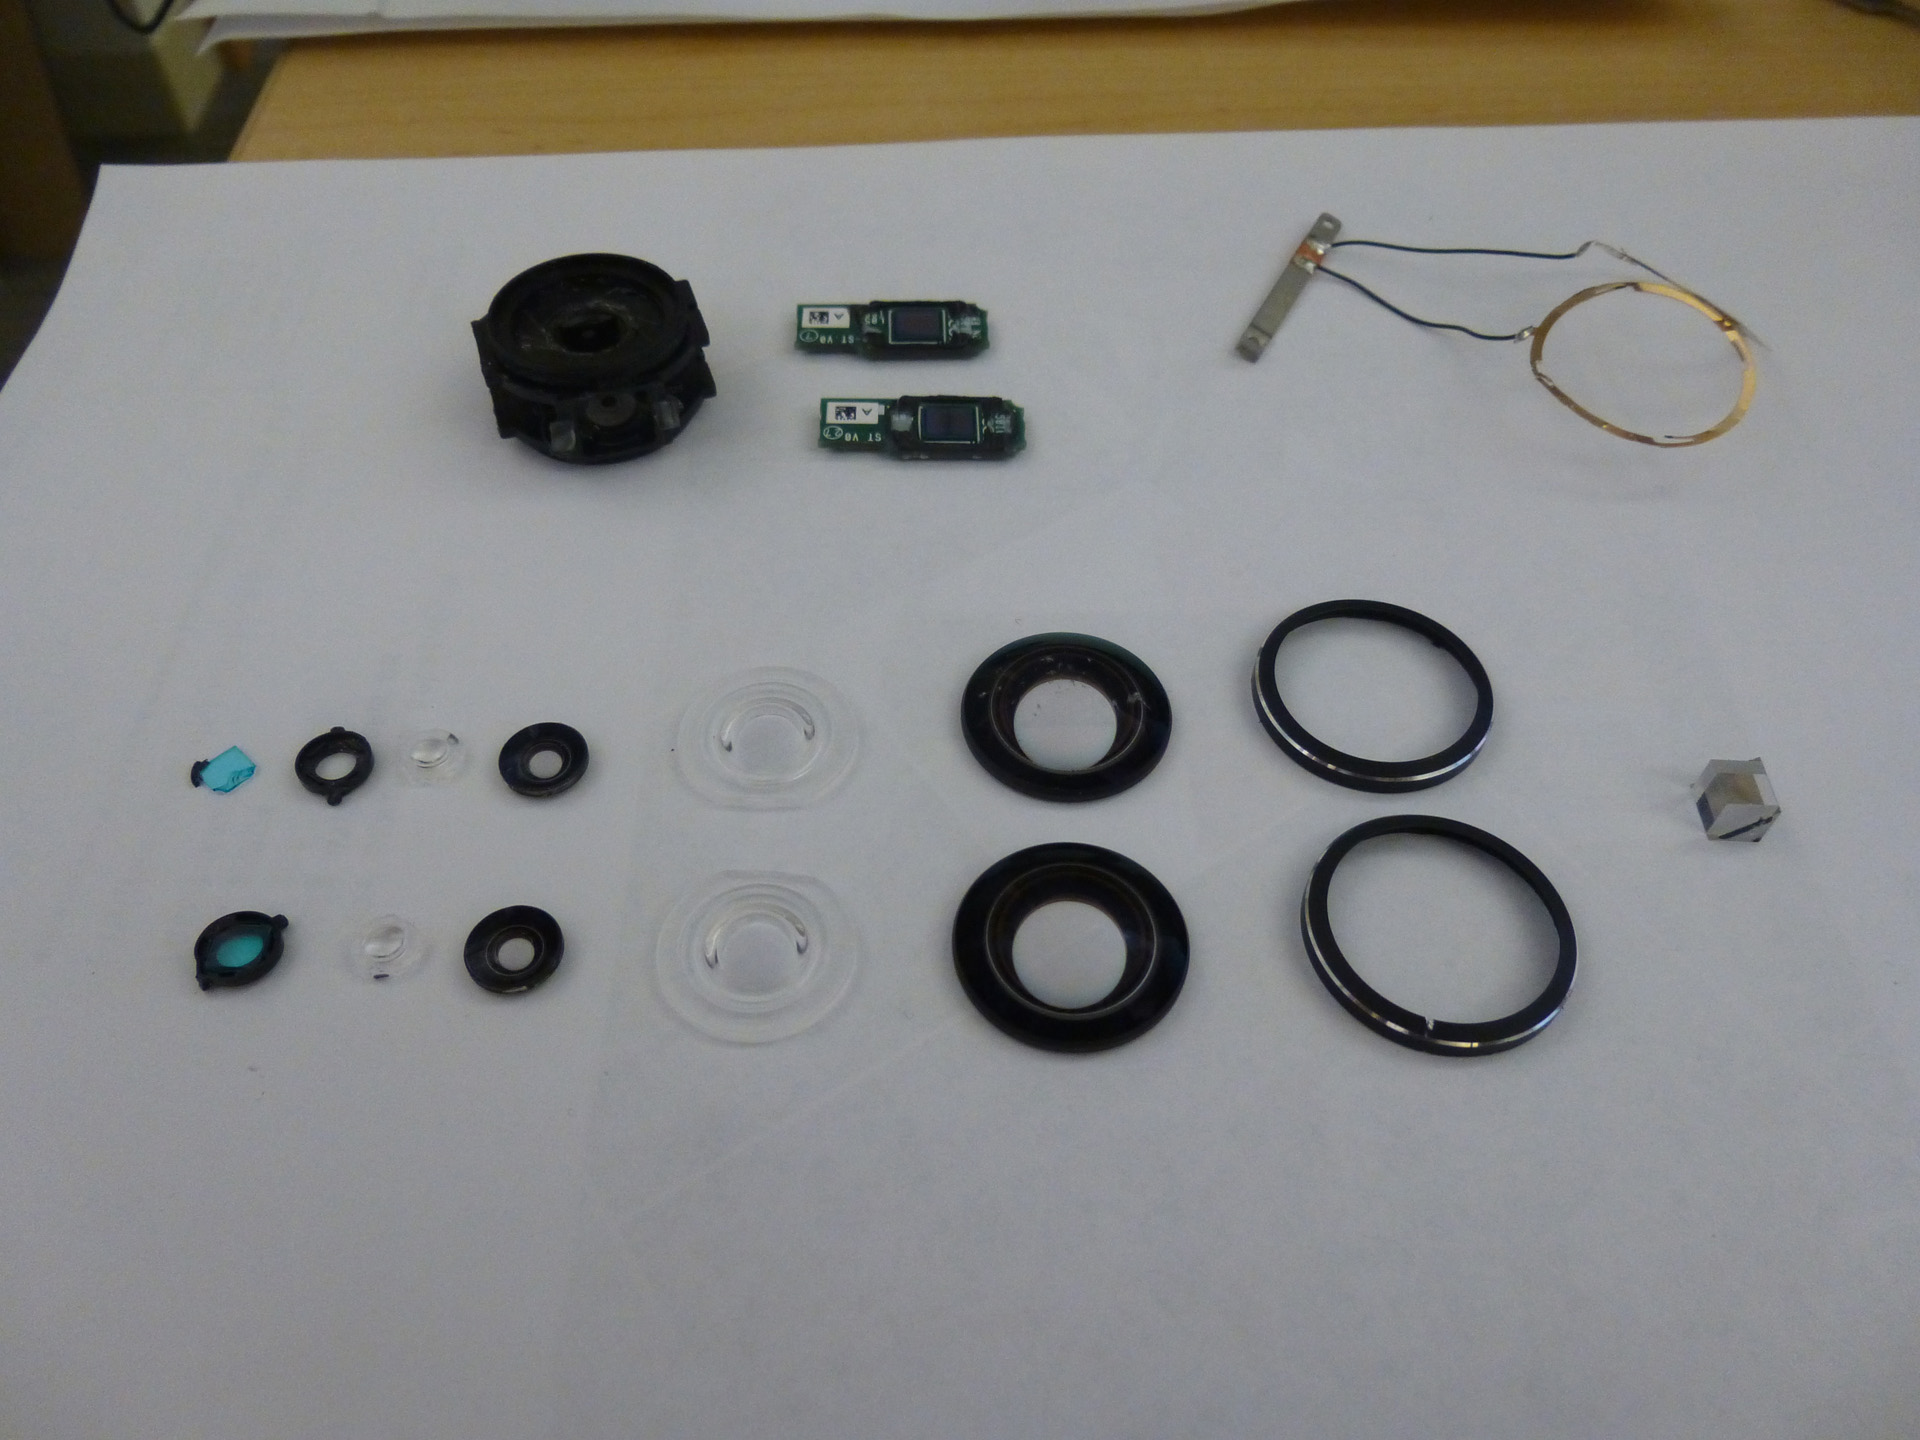
Here is the photo of all the parts that were ripped off from the optical / image sensor assembly.
This is just what I needed except for one detail. I got my Theta S on Thursday. I took it out on Friday to capture the Gum Wall before it was cleaned. It fell over and damaged the lens on the first shot. I have been able to repair the damage with 12,000 grit pads from Woodworker. I used coconut oil and they polished up great. When I pushed it back together after the fall the image on the switch side was out of focus. I took it apart and was able to pry the lens back into focus. While repairing the lens it went out of focus again. I have removed the solder on the back of the lens and removed the screws in the optical housing. I was hoping that the lens would be able to move easily to get back where I had put it on the first fix. It has not done that so far. I got the first fix by prying on the outer lens housing. I am wondering if you saw anything that would allow the lens to re position and then to be held by the solder or the screws. Or if you discovered any other focus method, I would be interested.
Hi John, sorry for the accident. To be honest, I never though of sanding out scratches using fine grit pads, because I would be afraid of damaging 1) the coding; 2) the shape of the lens profile, which are both critical for focus. Since it’s already been done, we might have to shift the lens around to find an alternative sweet spot for focus, just as what you did. I actually didn’t see too much space inside the 1st generation for the lens to shift around because it is so well packed. I am not sure if I could be of any help beyond this point, but you can keep trying re-position of the lens. Good luck!
After I got the lens polished good enough I put it back together. The first time I did this it worked fine. The second time it does not come back to life. I think it was probably because I worked on it with the battery in. It is important to know that the battery is held in with double sided tape and can be removed with enough force. The battery connectors are spring loaded and when the battery moves, it comes out clean. The charging light comes on but otherwise it seems to be dead. It might have been that one of the cable clamps was not properly engaged and the power switch was accidentally hit. I am sad if it is toast and will probably get another one when they are available.
The Theta S does not have screws on the metal strap. You have to use a knife or some other instrument to pry the side without the shutter switch off. Start at the round end.
The first time I took it apart I totally removed the cover without the switch. I found out that I could have left the flat end together and still reached the two screws that hold the lenses in. Taking it off damaged the plastic at the tripod screw.
If you pry it apart at the round end the cover opens up so that the outer screw is available at the end. The inner screw is available through the lens hole. These are very small black screws that can be hard to turn. Once the lens is mobile there is a small black cable clamp part that releases the flat cable. After you flip it open you have to lift the cable away from the clamp so that the notches release. After these two are released, the microphone wire is taped to the optical unit. When it is released the optical unit can be released.
I don’t know if you can get the battery out without removing the cover. I would recommend removing the battery before working on the electronics.
How could you take the out-most convex lens of the optical/image sensor assembly?
I think I am going to disassembly it because I need to use fine grit pads too (accident with a drone landing).
Some of my pictures here:
https://scontent-mia1-1.xx.fbcdn.net/hphotos-xlf1/v/t1.0-9/12705433_587843094698349_6187054331700577160_n.jpg?oh=8c447625da64fdfc4e8e5f3227097000&oe=572FE178
https://scontent-mia1-1.xx.fbcdn.net/hphotos-xlf1/v/t1.0-9/12705433_587843094698349_6187054331700577160_n.jpg?oh=8c447625da64fdfc4e8e5f3227097000&oe=572FE178
John, XueMing,
I am in the same situation as John.
After a flight with my drone, lens of the Theta S where damaged.
Here you can see some photos:
https://www.facebook.com/photo.php?fbid=587843094698349&set=pcb.1689984434553079&type=3&relevant_count=3
https://scontent-mia1-1.xx.fbcdn.net/hphotos-xtp1/v/t1.0-9/12715436_587843664698292_6878730047263642275_n.jpg?oh=18ad8189e6fe11c5f0e5411df3f80575&oe=5737E3EE
I tried to start repairing them with 1600 grit pads and toothpaste, without disassembling the camera (only taking off the plastic cover). Do you recommend not to do this then?
Any other help would be appretiated. Thanks in advance.
Sanding the lens is not strong recommended unless you have to . Because you may deform the lens profile as well as its coding, both are essential for sensors to produce good quality photo. John seemed to have it fixed by doing so, maybe you can give it a try too. If the scratches are not significantly bad, you probably can leave it alone. Small scratches won’t even leave any noticeable defects on your image.
Hi John, did you by any chance take photos of the disassembly process? I’m thinking about making an external trigger possibly by soldering two wires to the switch inside (as Idid with the M15)
Hi John, did you by any chance take photos of the disassembly process? I’m thinking about making an external trigger possibly by soldering two wires to the switch inside (as Idid with the M15)
John Finlayson, please!! Since you opened the pack, does it have the memory on a micro sD card like the previous?!?!? 😀
luca vascon.
John Finlayson, please!! Since you opened the pack, does it have the memory on a micro sD card like the previous?!?!? 😀
luca vascon.
i have the new Theta S camera, and i need to power for 6 hours of long timelapse, i tried to power the camera with a custom microUSB cable with +5v and gnd only without data wires, but turn it off itself. Any suggest? Is there a way to increase the internal memory?
I am not sure if the camera has a built-in turn-off timer. Usually you can disable the automatic turn-off function somewhere in the menu. As for the internal memory, yes for the old model. Because you can see from my blog the memory is actually an SD card. You can replace it with a bigger one. Not quite sure for the new model, I guess someone will have to take the new model apart to find out.
I don’t need a timer off, but i just need to have the camera always ON shooting all the images that i can store inside the memory! I tried to disassemble but this new version is different from your, no screws are here!
If you can disable the timer, your camera will always stay on.
Had mine on a try pod and a kid knocked it over so one of the lens has a scratch on it. Any way to buy a lens for it and replace it?
Maybe you try customer service?!
Hi raymondday61. I am also looking to buy a lens for Theta S. I scratched mine, so obviously i lost the warranty
Had mine on a try pod and a kid knocked it over so one of the lens has a scratch on it. Any way to buy a lens for it and replace it?
Maybe you try customer service?!
Hi raymondday61. I am also looking to buy a lens for Theta S. I scratched mine, so obviously i lost the warranty
Which IMU does it have? Only accelerometer or both accel + gyro?
I’m actually interested in knowing which IMU the Theta S has but it would be great to know which one this theta has too.
Thanks for the teardown!
Which IMU does it have? Only accelerometer or both accel + gyro?
I’m actually interested in knowing which IMU the Theta S has but it would be great to know which one this theta has too.
Thanks for the teardown!
Somebody help me!
I’m in Taiwan,My m15 side surface of the lens broken, anyone know where you can buy to replace it? Thank
If you can be more specific on your damage, e.g. brand, model, photo, I might be able to assist.
Somebody help me!
I’m in Taiwan,My m15 side surface of the lens broken, anyone know where you can buy to replace it? Thank
If you can be more specific on your damage, e.g. brand, model, photo, I might be able to assist.
My theta s no longer charges but if I hit it oddly, sometimes it does charge. Pain is butt though. If I tear it down do you think I could fix it with my limited knowledge as it seems like it is a loose connection at the plug. What do you think, give it a go? Warranty ran out December last year. I do not live in the USA and they are not sold where I live.
Why not? You won’t make it worse.
I never tore it down but I figured out how to change it – It needs to be on something heavy – if you zoom in to the picture you can see the red light is on and this is now I charge it.
https://www.reddit.com/r/360Cameras/comments/77rghi/charging_my_theta_s/